
How to operate a Midmark M9 or Midmark M11 Autoclave Leave a comment
Looking for a refurbished Midmark M9, please follow this link – https://statimusa.com/product-category/midmark/refurbished-midmark-autoclaves/m9-refurbished-midmark-autoclaves/
Looking for a refurbished Midmark M11, please follow this link – https://statimusa.com/product-category/midmark/refurbished-midmark-autoclaves/m11-refurbished-midmark-autoclaves/
Looking to Repair your Midmark Autocalve, please follow this link – https://statimusa.com/repairs-form/
Looking to sell us your Midmark Autoclave, please follow this link – https://statimusa.com/sell-us-autoclave/
This is an overview of how to operate your Midmark M9 and Midmark M11 Autoclave. Always refer to the appropriate technical documentation for the complete list of instructions, safety alerts, and sequence of procedures before conducting any service or maintenance operations. And if you just want to talk to someone, call our Free Tech Support at 704-966-1650 Option 3.
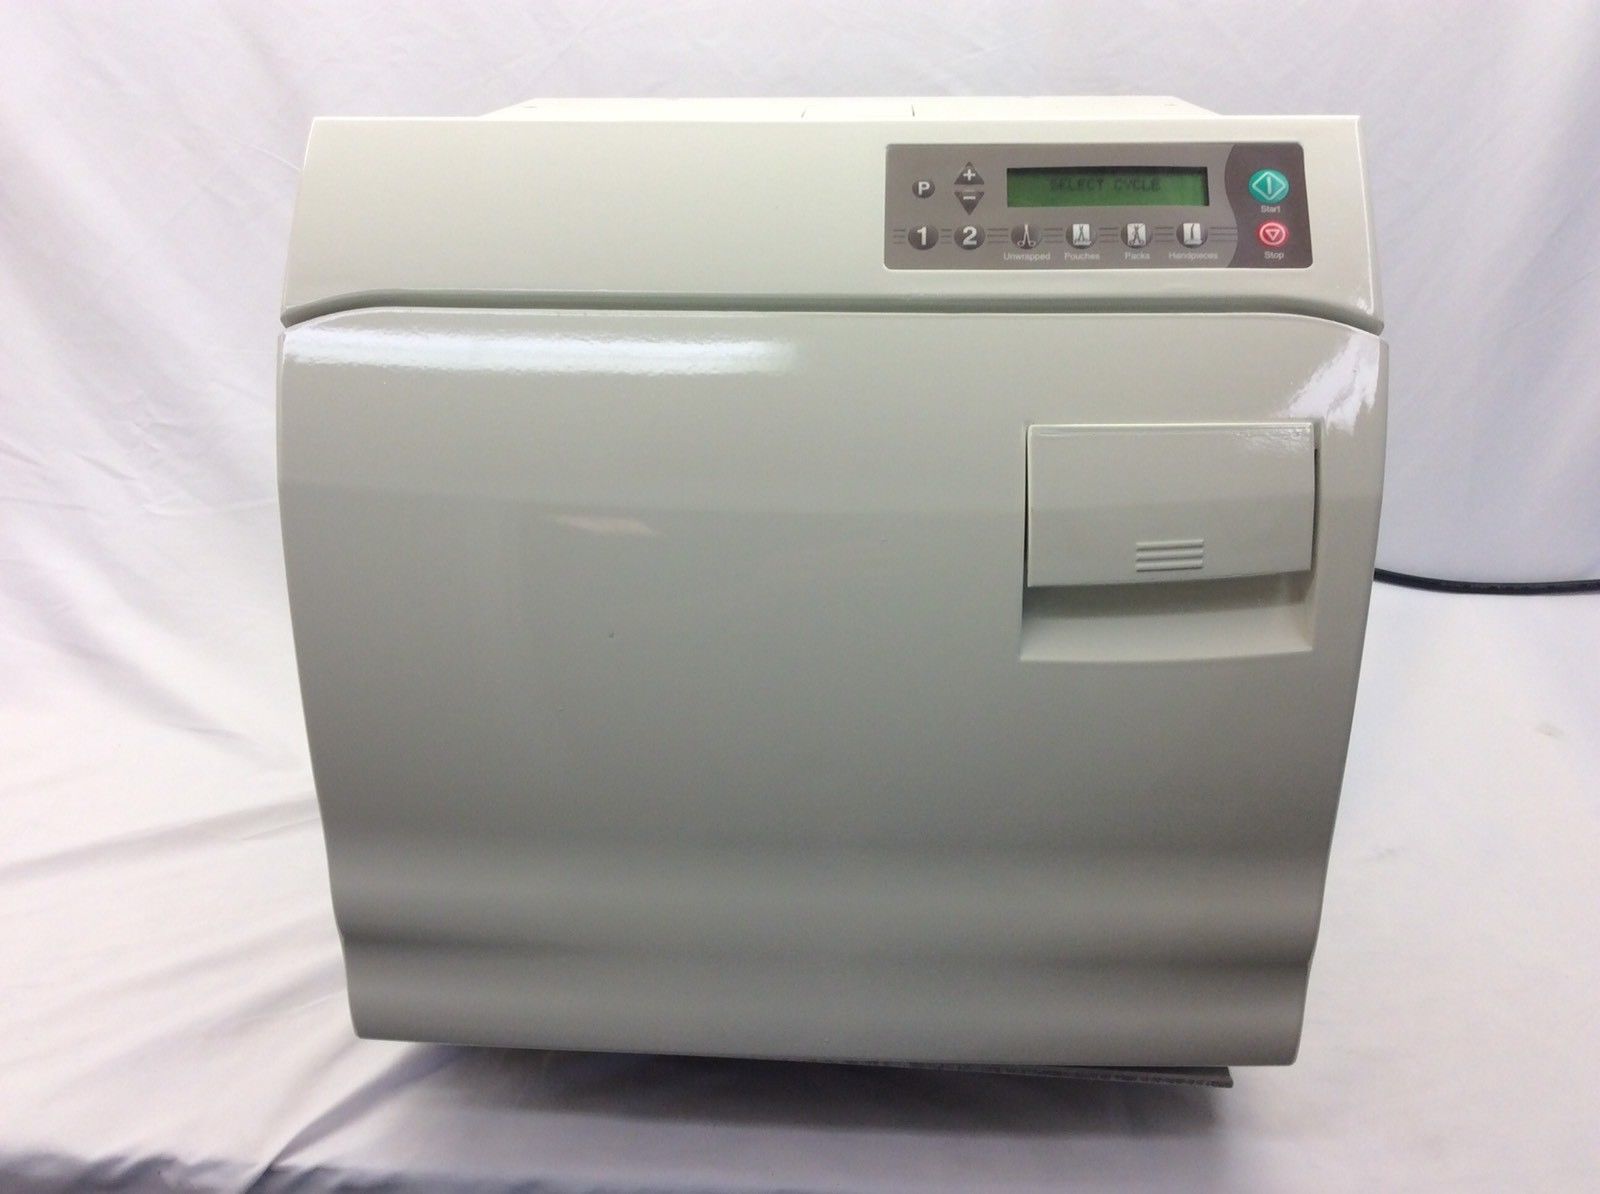
Your Autoclave has four pre-programmed cycles and two programmable cycles. The program cycles include: Unwrapped, pouches, packs and hand pieces. Cycle parameters can be found in the installation and operations manual.
After verifying that the Autoclave has an adequate fill of water and has been loaded properly with sterilization items, close and latch the door. This is done by lifting the door handle and pushing the door closed. While pushing in on the door, slide the door handle down to engage the latch, the display will show: ‘select cycle’ and waits for input from the operator. If the start button is pressed, additional heat is shown on the display. This allows the operator to either preheat the unit or extend the drying time on the previous cycle. Pressing the stop button will end the additional heat time. After pushing one of the standard cycle program keys, the display will show two alternating screens on the LCD display. The first screen shows the name of the cycle, sterilizing temperature and the amount of sterilizing time. After a brief pause, the second screen shows the type of venting to be used and the amount of drying time. Next, you’ll push the start button.
The display immediately shows the message ‘filling chamber’ followed by ‘chamber is full’ when the proper water level is raised. Now, the unit will begin to heat to the appropriate temperature for the cycle being used. The display changes as temperature and pressure in the chamber changes. Once the appropriate sterilizing temperature is reached, the display shows the time count down from the program time, it monitors the temperature and pressure. During sterilization mode the heater will cycle on and off. Just prior to the end of the sterilization cycle ‘ready to vent’ is displayed for 10 seconds and the vent cycle begins. The vent valve opens and steam and water is released back into the reservoir. The display changes as temperature and pressure in the chamber changes, keep clear when the M9 or M11 door is ready to open. Failure to do so could result in severe burns from steam being released. An audible signal is emitted to indicate that the door is about to open.
When pressure in the chamber reaches zero, the door actuates to a partially open position beginning the drying cycle. The Autoclave displays the amount of time remaining for the drying cycle and counts it down to zero. At the end of this countdown an audible signal is emitted for 10 seconds indicating that the sterilization cycle is complete. After sterilization is complete, all items must be handled in accordance with regulatory guidelines.
Caution: The process load and inner surfaces will be hot, avoid contact with hot surfaces. Failure to do so could result in serious burns. Remove trays and cassettes using the Midmark approved trade cassette tool. Hold the tray level and slightly elevate it to prevent it from shifting and becoming dislodged. Qualified personnel responsible for infection control should prepare a protocol for handling sterilized items. This protocol should be followed by all personnel responsible for handling sterilized items and should include the basics. Unwrapped sterilization is not recommended for critical or implantable items. Unwrapped items should be transported immediately and aseptically from sterilizer to the point of use. Allow items to dry before handling or storage. Wrapped items may be stored before use. The storage area should be a closed or covered space away from environmental contaminants or wetness.
For more detailed information about operating your Autoclave, please refer to the M9/M11 installation and operation manual. For further support contact Sterilizer Autoclave Solutions Technical Support Line at 704-966-1650 or you can email our technical support group at Sterilizerrepair@yahoo.com. You can also visit us on the web at StatimUSA.com
As always if you have any questions about this process or anything else please feel free to contact us and take advantage of our “FREE TECH SUPPORT.”
We also offer FREE VIRTUAL TECH SUPPORT to “See and Talk” with a “Real Time Live Technician” for any problems you may be in need of help with.
You can also use our “FREE MAINTENANCE PROGRAM”. Take the guesswork and worrying about what unit is due for maintenance and which maintenance cycle it is time for. We will keep track of all your autoclaves and let you know when it’s time for anything.