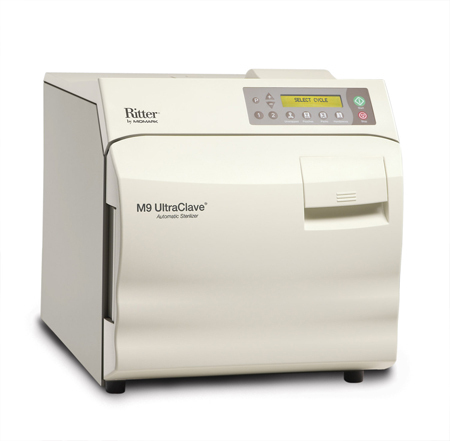
How to Safely Load a Midmark M9 or M11 2
Here is a basic overview of how to safely load a Midmark autoclave. You will want to be sure and always refer to the appropriate technical documentation also. That is where you can find the complete list of instructions, safety alerts, and sequence of procedures for the machine. And you will want to do that before conducting any service or maintenance operations.
And if you just want to talk to someone, call our Free Tech Support at 704-966-1650 Option 3.
Before You Begin
Before placing any instruments into the autoclave check the manufacturer’s guidelines. First you want to be certain the materials are compatible with steam sterilization, and second, you should verify the acceptability of sterilization parameters.
What is Good
The M9 and M11 are designed to sterilize the following:
- Metal instruments
- Rubber and plastic devices
- Wrapping and bundling materials
- Cassettes
- High and low-speed handpieces
- Surgical instruments.
What is Bad
DO NOT sterilize items composed of any of the following materials in the M9 or M11:
- Corrosion sensitive metal
- Fragile items susceptible to breaking under pressure or high temperature
- Biomedical waste
- Plastics that may break down or produce residue when exposed to steam or high temperatures
And you should always clean and dry instruments thoroughly before placing them into the autoclave. Improper cleaning may result in non-sterile instruments or damage to the unit.
Ensuring Proper Sterilization
Follow a few general guidelines and your M9 or M11 will function properly. This will ensure that steam circulation, air circulation, and adequate drainage of the condensed steam can take place.
Place all containers so the opening allows steam to enter, and the air to un-condensate so it can drain from the container. Use only M9 or M11 trays in the appropriate sterilizer because using other trays could restrict air and steam flow to items. Place jointed items like forceps or pliers in an open position. And always load handpieces and instruments in a single layer not piled or stacked.
Unwrapped and Wrapped Sterilization
The M9 and M11 are capable of sterilizing unwrapped instruments for immediate use. Always place a towel or absorbent paper on the bottom of the tray before putting unwrapped items into it. Follow regulatory guidelines for using unwrapped sterilized instruments.
The M9 and M11 also sterilize pouched or wrapped items to preserve sterility after processing. When pouching or wrapping items, use only sterilized or pouches and wraps that have been cleared by the FDA. Ensure they are labeled for use with the steam sterilization cycle being used.
Using Cassettes for Sterilization
When using cassettes in the M9 or M11 do not wrap items too tightly. Sterilization can be compromised if an item is excessively wrapped.
Pack pouched items loosely and always load handpieces and instruments in a single layer not piled or stacked. This will permit proper steam flow and penetration to the items.
The preferred orientation for pouches is resting on their edge. This is best accomplished using the Midmark pouch rack accessory. But if you are using the standard tray, pouches should be placed paper side down.
Regulatory Guidelines for Sterilization
To safely load a Midmark autoclave you must process all items in accordance with regulatory guidelines for infection control. These regulations include the following:
- All items must fit in the M9 or M11 tray
- The loaded tray must slide into the chamber opening without scraping
- Instruments must not touch one another
- Pouches may overlap slightly, but items must not be layered.
For maximum sterilization load information you can refer to the charts in your installation and operations manual. But some of the basic rules to follow are:
- If a load surpasses a listed limit divide the load and run multiple cycles
- Do not overload the chamber
- Do not run the sterilizer without the tray plates in place
Remember that adequate space is required around items and trays for steam circulation and drying. Failure to allow adequate space will compromise sterilization and drying.
This is a basic outline for understanding the process and function of safely loading a Midmark M9 or M11 Autoclave. For more detailed information about loading your autoclave, please refer to the M9 or M11 installation and operation manual.
StatimUSA.com is your number 1 resource for all things autoclaves, we sell new Midmark M9 autoclaves and new Midmark M11 autoclaves, repair your old autoclave and even purchase your old autoclave back from you. Try us today, you wont regret it! You can reach us at info@statimusa.com or call our FREE TECHNICAL SUPPORT LINE at 704-966-1650.
As always if you have any questions about this process or anything else please feel free to contact us and take advantage of our “FREE TECH SUPPORT.”
We also offer FREE VIRTUAL TECH SUPPORT to “See and Talk” with a “Real Time Live Technician” for any problems you may be in need of help with.
You can also use our “FREE MAINTENANCE PROGRAM”. Take the guesswork and worrying about what unit is due for maintenance and which maintenance cycle it is time for. We will keep track of all your autoclaves and let you know when it’s time for anything.


Please advise me about proper placement of pouched instruments into autoclave. Should instruments pouch lay paper down or paper up on the rack of autoclave.?
Thankfully,
Natalya Radmer
natali55r@gmail.com
Hi Nata…Typically, this is dependent on the manufacturer of the autoclave and pouches. As a general rule of the thumb, inside the operators manual / instruction for use with every autoclave they have a section describing loading instruments into the autoclave. This is where the manufacture will give the recommendations for loading pouched instruments into the autoclave.