
Replacing the Tuttnauer EZ11Plus Door Gasket Leave a comment
When it comes to our Free Autoclave Technical Support, we like to make sure that you have any available resources you need. And that’s why we’re doing articles like this one, to help with certain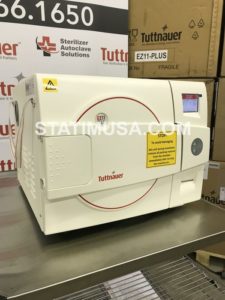 issues that are an easy but thorough read into a specific problem you may have. This article is going to focus on the replacement of the Tuttnauer EZ11Plus door gasket. We strive to be as informative as possible, but if you need anymore support, you can always contact our Virtual Technician here to help at any time. Our Virtual Technician can help you get in touch with us directly to share pictures, videos, or even live chat support to help with what you need.
And if you have any questions, you can call our Free Tech Support line, 704-966-1650 Option 3 for free technical support.
Replacing the Door Gasket
 To avoid injuries, replace the gasket while the autoclave and autoclave door are cold.
Removing the Old Door Gasket
Before we start the replacement process, make sure to remove the old door gasket following these instructions:
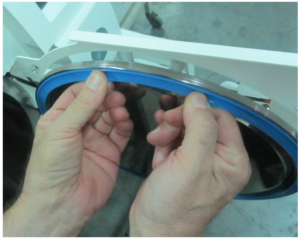
Start by opening the door of the autoclave and removing the old gasket from the groove.
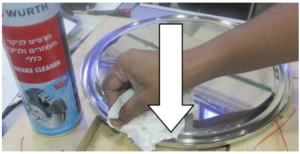
Then clean the groove thoroughly with a plastic scraper and some plain water as needed. Make sure there is nothing left in the groove that will hinder the seal of the new door gasket.
Putting in the New Gasket
When you’ve cleaned out the groove thoroughly, then you need to lubricate it for the new seal. Manufacturer’s recommendation is to use silocone-based lubricants like Würth Silicone Lubricant or Dow Corning 111 when installing. Line the inside of both sides or walls of the gasket groove with a small amount of the lubricant. It can be sprayed in or brushed depending on what kind you use. Fully coat the inside of the groove, but be careful that you’re not putting in too much.
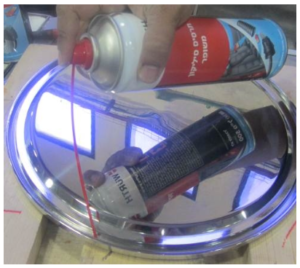
Caution: If insufficient lubricant is applied, replacing the gasket will be difficult. If excess lubricant is applied, the gasket will ‘spring’ out of the groove.
Now it’s time to put in the new gasket. Remove it from it’s package and press it into the groove all the way around with your finger or other tool. You do this in one continuous motion for proper installment.
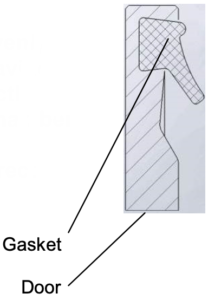
You must make sure that the gasket sits flush and evenly without waves, humps or cavities. These can lead to the door gasket not having a proper tight seal to the unit, making its own whole list of problems, so be thorough. The following drawing shows a proper representation of how the seal should sit inside of the groove:
Once your new gasket is installed, we recommend running a test cycle to make sure the seal works properly.
Once the cycle is run and everything is working the way it should be, your Tuttnauer EZ11Plus autoclave and it’s new door gasket are ready for use!
As always if you have any questions about this process or anything else please feel free to contact us and take advantage of our “FREE TECH SUPPORT.”
We also offer FREE VIRTUAL TECH SUPPORT to “See and Talk” with a “Real Time Live Technician” for any problems you may be in need of help with.
You can also use our “FREE MAINTENANCE PROGRAM”. Take the guesswork and worrying about what unit is due for maintenance and which maintenance cycle it is time for. We will keep track of all your autoclaves and let you know when it’s time for anything.
The Tuttnauer EZ11Plus is available here.
The Tuttnauer EZ11Plus Door Gasket is available here.
Any other parts you may need for the Tuttnauer EZ11Plus can be found here.