
W&H Lexa Printer Management Guide
We’ve recently talked about the W&H Lexa sterilizer, and now we’re going to add onto this press with the printer management guide. This article has all the steps to properly set up and operate the W&H Lexa sterilizer printer function the way the manufacturer intended. And if you have any questions about this or anything else, you can call us at 704-966-1650, option 3 for our free tech support.
Managing Printers
This section deals with the following subjects:
- Printer selection (optional)
- Label printer selection (optional)
- Label printer usage (optional)
- Label content description
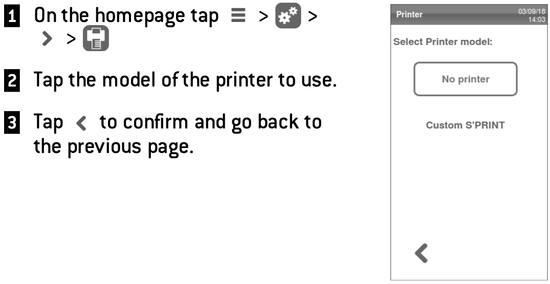
Printer Selection (optional)
Select the Printer
Note: The sterilizer only supports the specific printer models available through manufacturer/importer.
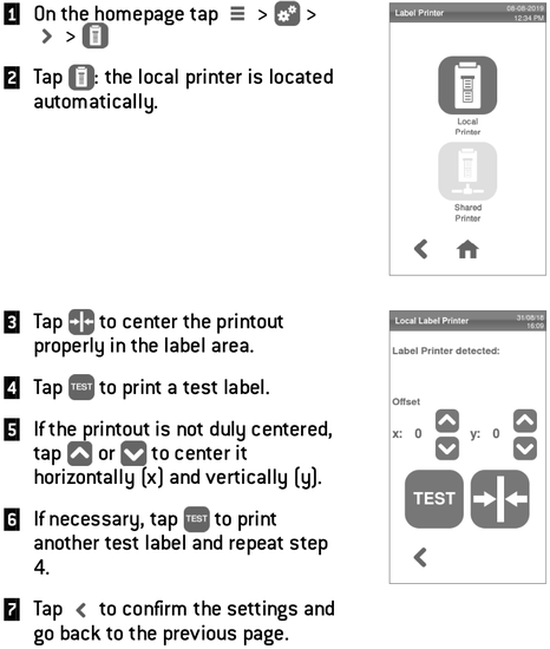
Label Printer Selection (optional)
Function Activation
The first time you access the Label Printer menu, you will be requested to enter an activation code. To require the activation code, please refer to the Activation code instructions provided with the label printer.
Label Printer Setup
Labels can be printed by a local label printer or (only with a LAN connection set) a shared label printer. The local label printer is connected to the sterilizer, while the shared label printer is connected to another sterilizer in the network.
Select and Calibrate a Local Printer
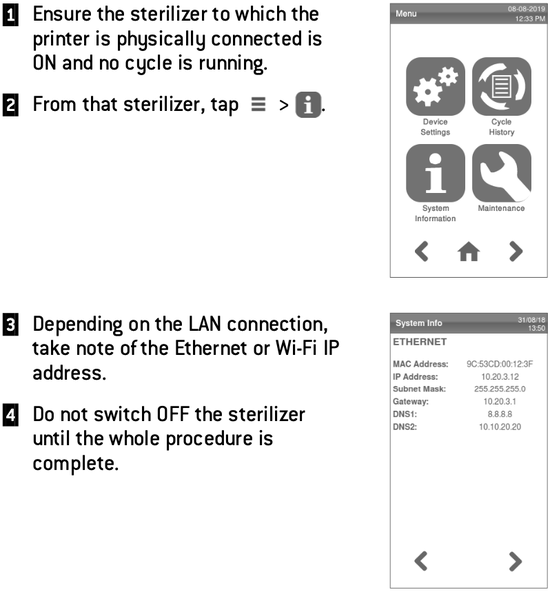
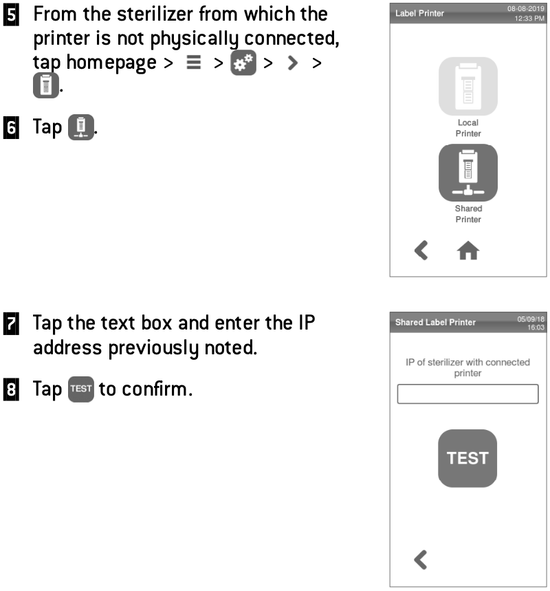
Select a Shared Label Printer
Note: Function available only if the LAN/Wi-Fi connection has been activated (optional).

Label Printer Usage (optional)
![]()
CAUTION! For your safety and the safety of your patients use a storage time compliant with the recommendations of the manufacturers of the containers/packaging used, and with applicable norms and rules.
Function Availability
The first time you access the Label Printer menu, you will be requested to enter an activation code. To require the activation code, please refer to the Activation code instructions provided with the label printer.
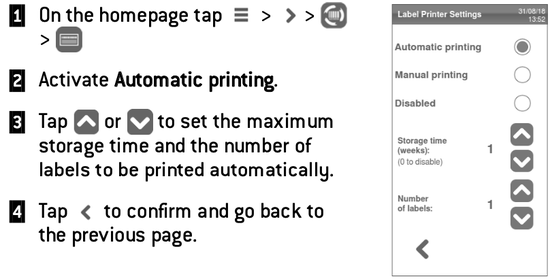
Automatic Printing Option
The automatic printing option permits to automatically print a preset number of labels after a successful sterilization cycle. The labels are printed only after the user has identified him/herself (with password if required) and the load has been checked and released, if these options have been enabled by the administrator.
For the automatic label printing, a maximum storage time in weeks can be set. This value is used to calculate the expiry date to be printed on the labels (see “Label content description”).
Set the Automatic Label Printing
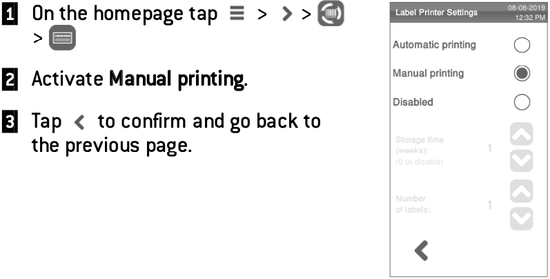
Set the Manual Label Printing
The manual printing option permits the user at the beginning of a sterilization cycle to set manually the number of labels to print.
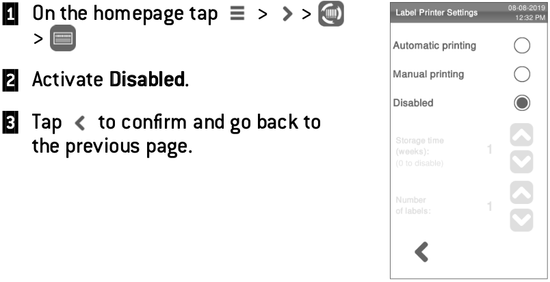
Disable the Label Printing
If the label printing is disabled, no label can be printed at the end of a sterilization cycle.
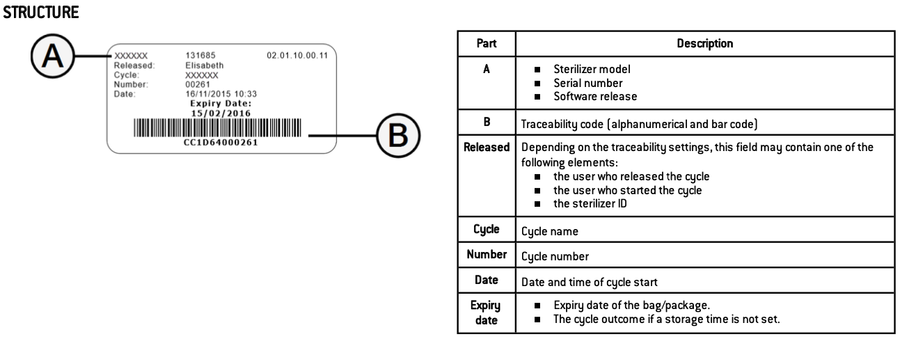
Label Content Description
As always if you have any questions about this process or anything else please feel free to contact us and take advantage of our “FREE TECH SUPPORT.”
We also offer FREE VIRTUAL TECH SUPPORT to “See and Talk” with a “Real Time Live Technician” for any problems you may be in need of help with.
You can also use our “FREE MAINTENANCE PROGRAM”. Take the guesswork and worrying about what unit is due for maintenance and which maintenance cycle it is time for. We will keep track of all your autoclaves and let you know when it’s time for anything.