
W&H Lexa Maintenance Guide
We’ve recently talked about the W&H Lexa sterilizer, and now we’re going to add onto this press with the maintenance guide. This article has all the steps to properly maintain your W&H Lexa sterilizer the way the manufacturer intended. And if you have any questions about this or anything else, you can call us at 704-966-1650, option 3 for our free tech support.
Maintenance
This section deals with the following subjects:
- Warnings for maintenance operations
- User maintenance
- Monthly or 50-cycle maintenance
- 1200-cycle or yearly maintenance
- Extraordinary maintenance
- Disposal
Warnings for Maintenance Operations
Warnings
![]()
WARNING! Turn the sterilizer OFF and remove the power cord before beginning any maintenance. Follow all health, safety, cross-infection and cross-contamination protocols. Maintenance operation shall be done at illumination level of 215 lx (±15 lx) to 1500 lx (±15 lx). Before making any operation, ward off unauthorized personnel from the working area.
![]() CAUTION! Before accessing the chamber and the connected parts, be sure that the sterilizer is cold.
CAUTION! Before accessing the chamber and the connected parts, be sure that the sterilizer is cold.
Notice: Follow the instructions in this guide when carrying out any maintenance on the sterilizer.
Frequency 1 Cycles 1 Operation
Monthly 50 Clean the door gasket and the chamber face side.
Clean the chamber, trays and the rack.
Clean the chamber filters.
Clean the external surfaces of the sterilizer.
Yearly *2 1200 *2 Replace the door gasket.
Replace the HEPA filter.
*1 Note: Whichever occurs first
*2 Note: Even if the maximum cycle number is not reached, it is recommended to replace the consumable parts every year, or if they appear worn or damaged, or if the filters are clogged or discolored.
Expired Maintenance
The sterilizer monitors the wear of consumables by counting the number of cycles executed since the last replacement.
When the number of cycles is close to the maximum, a pre-alert about the concerned consumable is displayed. Please check that you have the requested spare part available, buy one if not. When the maximum number of cycles has been met, a message to replace the consumable will be displayed.
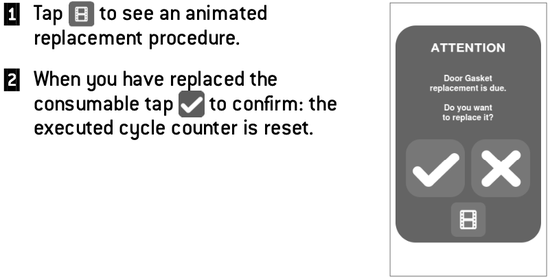
Replace the Consumables Before the Maintenance Due Date
If you replace the consumables before the request of replacement appears, you should manually reset the counters through the following procedure.

Monthly or 50-Cycle Maintenance
CLEANING THE DOOR GASKET AND THE CHAMBER FACE SIDE Proceed as follows:
- Clean the door gasket and the outer edge of the chamber with a non-abrasive cloth moistened with clean water.
- Rinse with clean water.
Note: When the seal is new it might be necessary to hold the door gently closed at the sterilization start.
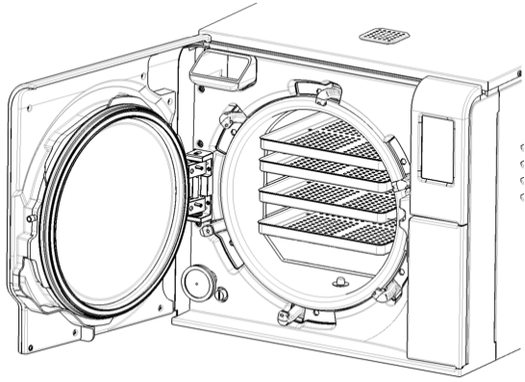
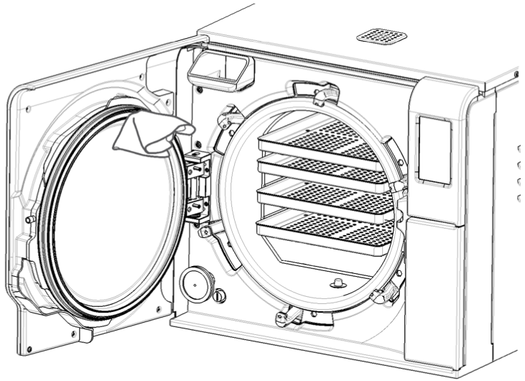
Cleaning the Chamber and the Chamber Accessories
Proceed as follows:
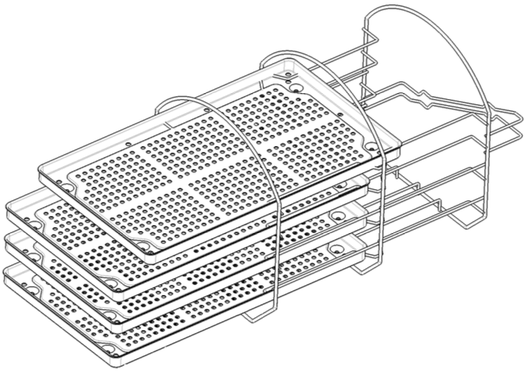
- Remove the trays and the chamber rack.
- Clean the chamber with a damp sponge and a mild detergent solution paying attention not to bend or damage the temperature probe inside the sterilizer chamber.
- Rinse with water.
- Clean the trays and the chamber rack with a damp sponge and a mild detergent
solution. - Rinse with water.
- Reposition all pieces of the chamber accessories properly.
Note: The trays and the tray holder may also be cleaned in a washer disinfector.
Cleaning the Chamber Filters
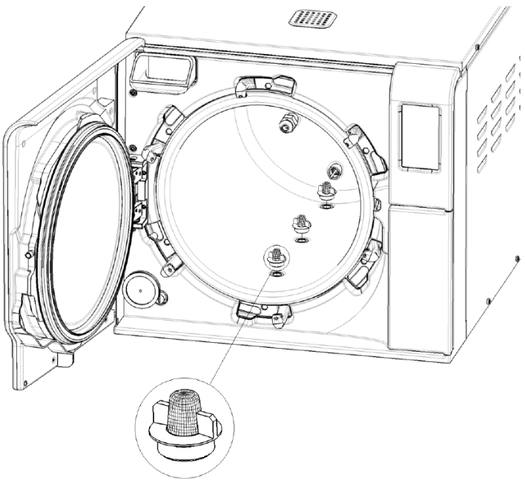
Proceed as follows:
- Allow the sterilization chamber to cool down.
- Empty the sterilizer chamber by removing the trays and the rack.
- Remove the filters at the bottom of the chamber (bottom/center) by unscrewing them.
- Rinse the filters with tap water.
- Insert the filters in their original position, screwing them into place.
Cleaning the External Surfaces of the Sterilizer
Proceed as follows:
- Clean all external sterilizer covers with a slightly damp cloth moistened with water.
Notice: Never use disinfectants, detergents or abrasive products.
1,200 Cycle or Yearly Maintenance
Replacing the Door Gasket
Notice: The door gasket needs to be replaced every 1200 sterilization cycles or once a year, whichever come first. A replacement message alerts when replacement is due. If the consumables is replaced prior to the message, you have to reset the consumable cycle counter.
Proceed as follows:
1. Open the chamber door.
2. Remove the used door gasket by hand.
3. Carefully clean the seal seat and the inside face of the chamber door.
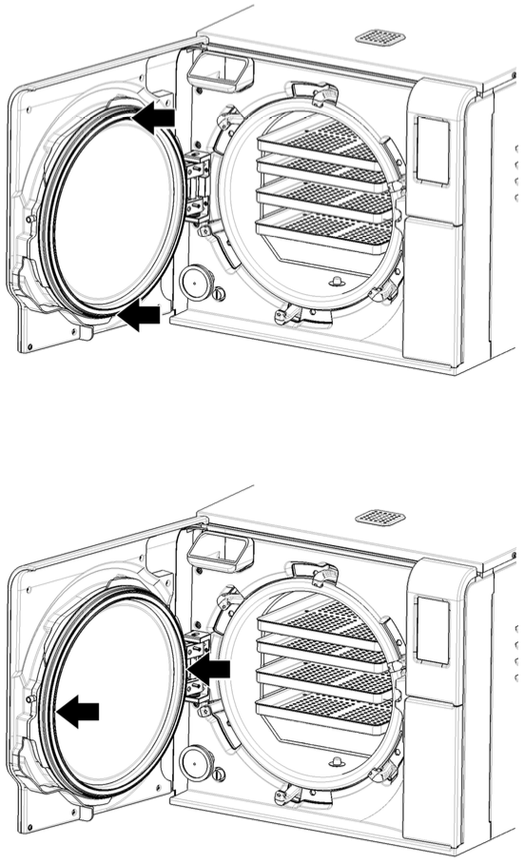
4. Insert the new seal and press first up and down.
5. Press left and right.
6. Make sure the door gasket is seated evenly.
Replacing the HEPA Filter
Notice: The HEPA filter needs to be replaced every 1200 sterilization cycles or once a year, whichever come first. A replacement message alerts when replacement is due. If the consumables is replaced prior to the message, you have to reset the consumable cycle counter.
Proceed as follows:
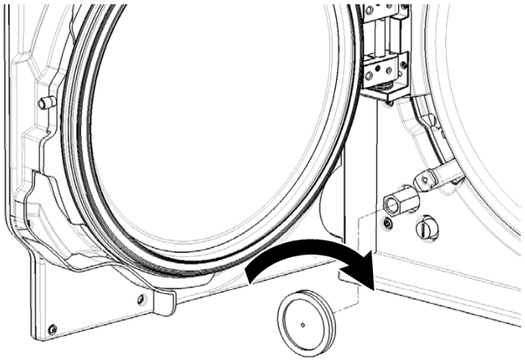
1. Open the sterilizer door.
2. Unscrew the HEPA filter by hand (counter-clockwise).
3. Screw on the new HEPA filter (clockwise) and tighten it snug.
Extraordinary Maintenance
DRAINING THE USED AND CLEAN WATER TANK
If you left accidentally the tanks full for more than seven days or if you plan not to use the sterilizer for at least seven days, you have to drain the tanks.
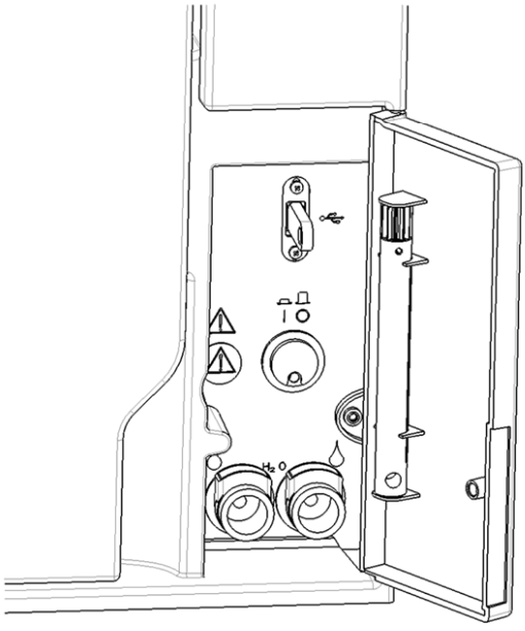
- Open the sterilizer service door.
- Put a container below the sterilizer (1.84 gal (7 l) minimum) and place the end of the drain tube in it.
- To drain the used water, insert the drain tube connector in the grey port.
- To drain the clean water, insert the drain tube connector in the blue port.
- When the water has been completely drained, press the release button to remove the drain tube and close the service door.
Disposal
DISPOSAL RESPONSIBILITY
- Separate the various components according to the materials they are made of.
- Drop the sterilizer with a company that specializes on the recycling of related products.
- Do not abandon the sterilizer in unsecured places.
- Always refer to current/applicable laws and rules in the country of use.
The same instructions apply to disposal of all used consumable parts.
MATERIALS
The sterilizer is mainly built from fiber-reinforced polymers, metals and electric / electronic components.
As always if you have any questions about this process or anything else please feel free to contact us and take advantage of our “FREE TECH SUPPORT.”
We also offer FREE VIRTUAL TECH SUPPORT to “See and Talk” with a “Real Time Live Technician” for any problems you may be in need of help with.
You can also use our “FREE MAINTENANCE PROGRAM”. Take the guesswork and worrying about what unit is due for maintenance and which maintenance cycle it is time for. We will keep track of all your autoclaves and let you know when it’s time for anything.