
SteriDent Static Heat Sterilizer Model #200 Operation Guide
The SteriDent Static Heat Sterilizer Model #200 is here at SAS, and in this article we’re going to cover the unit’s Operation Guide. The SteriDent Static Heat Sterilizer Model #200 is a cutting-edge autoclave designed to meet the sterilization needs of dental and medical practices. Featuring a compact and sleek design, and offers ease of use and efficient performance. With its reliable static heat sterilization method, the SteriDent Model #200 ensures thorough and effective sterilization of instruments. Providing a safe and hygienic environment for both patients and practitioners.
And these instructions provided by the manufacturer will ensure proper operation of the unit.
The Operation Guide
Important Safeguards
When using the Steri-Dent Dry Heat Sterilizer, follow these basic safety precautions:
- Read and understand all instructions.
- Care must be taken to avoid burns from touching hot parts.
- Do not operate this appliance with a damaged cord or if appliance has been dropped or
- damaged until it has been examined by a qualified service technician.
- Do not let power cord hang over edge of table or counter or touch hot surfaces.
- An extension cord should not be used with this unit. The unit should be plugged directly
- into a power outlet. Only use a properly grounded fuse/breaker protected outlet (110V, 60 cycles, or a 220/240V, 50 cycles). A separate circuit is recommended.
- To protect against electrical shock hazard, do not immerse this appliance in water or other liquids.
- To avoid electrical shock hazard, do not disassemble this appliance. Call a qualified service technician when service or repair work is required. Incorrect reassembly can cause electric shock hazard.
- Do not lift unit by the handle. Hold securely by the bottom when lifting or moving unit.
Operating Instructions
STERILIZER SET UP (First time only)
Before using the sterilizer for the FIRST time, the thermostat setting must be checked to ensure the sterilizer will operate at the proper temperature. For 320°F (160°C), verify the number “7” on the thermostat dial is lined up with the black marking dot located on the right side of the sterilizer. Set the timer to “HOLD” position.
After approximately 45 minutes, check the thermometer. It should read between 320°F (160°C) and 330°F (165°C). If not, adjust the thermostat dial and wait approximately 15 minutes for the temperature to change. NOTE: The thermostat dial is very sensitive. Decreasing the dial by 1 will drop the temperature approximately 15°F. Continue to adjust the thermostat as needed until the thermometer reads between 320 Degrees F (160 Degrees C) and 330 Degrees F (165 Degrees C). Temperatures may vary during initial heat-up period.
STERILIZER PROCEDURES
Steri-Dent Dry Heat Sterilizers* are intended for indoor use in hospitals and dental, orthodontic and health care facilities, veterinary, beauty and body art salons. They come equipped with a mechanical automatic timer, bi-metal thermostat, and thermometer.
Steri-Dent sterilizers are the result of a design that has been in use for many years by dentists, hospitals, and the U.S. Armed Forces. This design has been refined and improved over the years to make it safe and simple to operate, easy to use, and low in cost to operate. It is user friendly and very reliable, but requires the operator to choose the proper loading, temperature, and time settings to ensure complete sterilization.
*The Steri-DENT Sterilizer is non-patient care equipment.
INSTRUCTIONS FOR OPERATION
MECHANICAL AUTOMATIC TIMER
The timer serves as the ON/OFF switch for the sterilizer. To activate the timer and turn the sterilizer on, turn the knob clockwise (right) past the number “10”. The timer can then be set for the desired time as indicated on the calibrated scale dial. If intending to run additional cycles during the workday, turn the knob to the “Hold” position when a cycle is complete.
To set the timer for “warm up” or continuous operation, turn the knob counter clockwise (left) to the “HOLD” position. CAUTION: The sterilizer will remain on and in the warm up condition until it has been manually turned off or set for a timed sterilization cycle.
WARM UP – The sterilizer should be warmed up in preparation for a sterilization cycle. Before turning the sterilizer on, visually inspect the interior heating chamber. Close the door and turn the timer to the “HOLD” position. The unit will warm up and maintain 320°F (160°C) until a cycle is started. Do not insert a sterilization load until the unit has reached a temperature of 320°F.
CYCLE START – Before beginning a sterilization cycle, be sure instruments are clean and free of debris (for information about which materials can be safely sterilized refer to instruments validated for use in the sterilizer above). Prepare all instruments for sterilization by rinsing or using an ultrasonic cleaner, as recommended by the Centers for Disease Control (CDC).
Thoroughly rinse the instruments and pat dry with a paper towel. The CDC recommends bagging or pouching the instruments prior to sterilizing. Sterilization bags specific to dry-heat sterilization MUST be used.
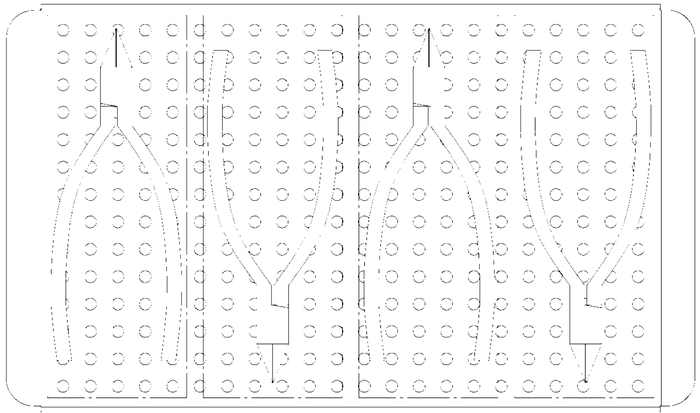
Instruments should be placed in a single layer and distributed evenly on the sterilizer’s trays. Instruments should not touch each other. Load instruments into sterilizer and pre-heat to temperature indicated in the TIME/TEMPERATURE chart. Run the sterilization cycle for the length of time indicated.
NOTE: Allow time for instruments to reach proper operating temperature before starting the time cycle.
TIME/TEMPERATURE CHART
| Contents | Preparation | Temperature | Time |
|---|---|---|---|
| Metal instruments, surgical blades, etc | Thoroughly cleaned and spread out on trays. | 320 Degrees F 160 Degrees C | 60 minutes |
MAXIMUM LOADING
- Model 200 Sterilizer – 1.3 pounds per tray (includes the weight of the tray)
- Model 300 Sterilizer – 1.4 pounds per tray (includes the weight of the tray)
MATERIALS INTEGRITY
The Steri-DENT sterilizer is designed to operate at 320°F (160°C), but could potentially reach temperatures up to 392°F (200°C). Tests have been conducted on various surgical and dental instruments as to compatibility with these temperatures. Generally, medical and dental stainless and carbon steel hand instruments are safe in the Steri-DENT sterilizer. Caution: Instruments containing plastic and rubber goods should not be sterilized in dry heat sterilizers. When in doubt, consult the instrument manufacturer.
CAUTIONS
- During operation, the door and outer housing as well as the heating coils, trays and sterilized instruments will be hot. Caution should be taken when handling hot instruments and trays. Use tool accessory to change out trays.
- The sterilizer is designed for use with metal instruments. While many new plastics, Teflon and rubber products can be used in a high temperature environment, extreme care should be used in sterilizing these materials until compatibility has been confirmed by the instrument manufacturer.
- When sterilizing packaged instruments, use only dry heat packaging material suitable for 392°F (200°C) temperatures. All items being sterilized and any associated wraps should be able to withstand temperatures up to 200°C (392°F).
- Instruments that have been wiped with alcohol or other flammable liquids must be allowed to dry completely before being placed in the sterilizer. Do not allow flammable materials or liquids within 12 inches (30.5 cm) of the sterilizer.
Instruments Validated for Use in Sterilizer
The Model 200 and 300 sterilizers have been validated to sterilize the Sirona Dental Systems, Cerex Omnicam sleeve and simple metal instruments such as those with hinges, mated surfaces, and lumens. Examples are cutters, pliers, mirrors, scalers, forceps, brackets, bands, burrs, amalgam plungers (lumens of 11mm maximum length by 2.5 minimum diameter), nippers, clippers, tweezers, and other similar devices.
The Model 200 and 300 sterilizers have not been validated to sterilize complex devices such as those that have power-driven machinery or multiple moving parts. These complex devices should only be sterilized according to the device manufacturer’s instructions.
SAFETY NOTES CONCERNING TEMPERATURE
The temperature in the Steri-DENT sterilizer is controlled by a bi-metal thermostat, which is calibrated during manufacturing to maintain temperature throughout the sterilizer chamber. The temperature control is extremely sensitive and calibrated to maintain 320° F (160°C).
After room temperature instruments are placed in the sterilizer, the temperature may drop a few degrees depending on the size of the load. Leave the timer in the HOLD position and Do Not begin the sterilization cycle until the thermometer temperature has returned to 320°F (160°C).
Do not open the door during a sterilization cycle as this will result in possible spore test failures and incomplete sterilization of instruments.
THERMOMETER & THERMOSTAT
The bi-metal thermostat is used to adjust the temperature of the sterilizer. The glass thermometer on the front of the unit indicates the sterilizer’s chamber temperature.
PILOT LIGHTS
The sterilizer has two (2) pilot lights. The left light will be on as long as the timer switch is in the “ON” position indicating the unit has power. The right light is on only while the heating elements are operating and heating the sterilization chamber. Once the chamber has reached sterilization temperature, the light will come on intermittently as current is needed to maintain the chamber temperature.
ACCESSORIES
The Steri-DENT sterilizer comes equipped with two or three instrument trays and a tool for changing trays. Biological indicator test strips, spore testing kits, and Steri-Dent brand nylon pouches are available from your distributor or CPAC. Depending on the size of your practice, you may wish to purchase additional trays.
Chemical Indicator Use
When using a sterilization bag, the chemical indicator listed below may be placed on the outside or inside the bag along with the instruments to provide an indication the instruments have gone through a sterilization cycle before use. The chemical indicator should only be used to prevent the accidental use of a bag of instruments that has not been sterilized. It is not a means of proving the instruments are being sterilized properly.
Spore Test Strips
The Centers for Disease Control (CDC) recommends the sterilizer be tested weekly. For Dry Heat Sterilizers, use Bacillus Atrophaeus spore test strips.
If you have any questions about the SteriDent Static Heat Sterilizer Model #200, any other CPAC units or autoclaves in general, please give us a call at 704-966-1650 option 3 for our Free Tech Support line. Or you can find our various programs using the links below.
As always if you have any questions about this process or anything else please feel free to contact us and take advantage of our “FREE TECH SUPPORT.”
We also offer FREE VIRTUAL TECH SUPPORT to “See and Talk” with a “Real Time Live Technician” for any problems you may be in need of help with.
You can also use our “FREE MAINTENANCE PROGRAM”. Take the guesswork and worrying about what unit is due for maintenance and which maintenance cycle it is time for. We will keep track of all your autoclaves and let you know when it’s time for anything.
The SteriDent Static Heat Sterilizer Model #200 is available to purchase from our website here.