Enbio S Autoclave Operating Instructions
Overview of the Enbio S
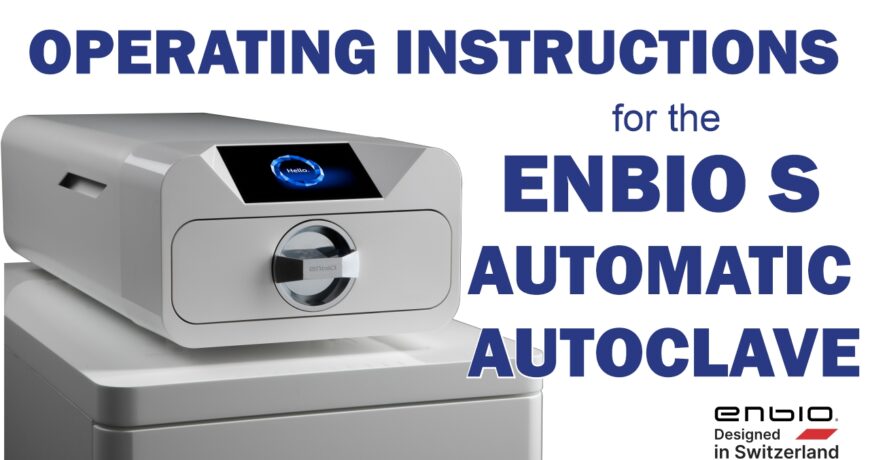
The Enbio S is the newest in Enbio’s line of high-quality, low price autoclaves. This autoclave is a Class B Pre/Post Vacuum Cycle style of autoclave. It can hold up to 8 pouches at a time and can sterilize tools in just 7 minutes with unpouched materials.
This easy-to-use device is meant for cost-efficient ease of access. No logging in or account management required. Just set up, press start and get sterilizing. And if you just want to talk to someone for any questions you may have, call our Free Tech Support at 704-966-1650 Option 3.
What is a Class B Autoclave?
A Class B Sterilizer is a high level steam sterilizer that uses a vacuum pump to remove air/steam mixtures from the chamber prior to sterilization cycle beginning . This process can remove 99% of the air inside of the chamber before the temperature and pressure increases to it’s necessary parameters.
Starting Up the Device
Initial Startup
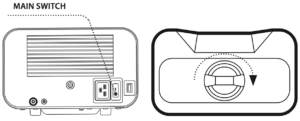
Before initiating the sterilization cycle, turn the device on using the main switch located on the rear panel of the device. Make sure that water supply and wastewater tubes are connected correctly, and that water is present in the water supply container, while the wastewater tank is empty, in order to prevent overflow. Monitor the water level in the tank regularly, depending on how frequently you perform your processes. Place tools or materials in the working chamber tray and close the chamber and turn the knob locking the front of the device clockwise.
Program Selection
Depending on the type of load to be sterilized, the user is responsible for selecting the appropriate program dedicated for the given type of load, in accordance with the manufacturer’s recommendations for sterilization.
PROGRAM ENBIO S 134°C FAST 134°C 121°C
Type of load Unpacked instruments Packaged and non-packaged tools Packaged and non-packaged tools
Process temperature 134°C 134°C 121°C
Pre-vacuum number 1 3 3
Sterilization duration 3.5 min 4 min 15 min
Drying duration - 3 min 5 min
Total process duration* 100g: 7 min 100g: 13 min 100g: 26 min
Class S B B
*Ambient temperature can affect the process extension.
*The duration of the first process may be longer due to the need for the device to heat up.
The 134°C program is recommended for the majority of sterilized materials due to the short duration of the entire program. The 121°C should be used to sterilize all other materials that cannot be subjected to sterilization at the temperature of 134°C. Do not exceed a maximum weight of 500g (1.10 lb) for ENBIO S.
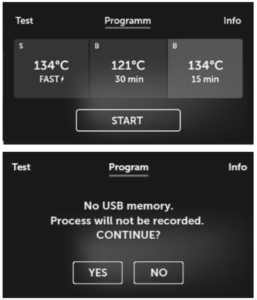 From here you can execute the Program, go to the Test, Information menu, and the COUNTERS menu. In the Program menu, you can choose the 121°C, 134°C temperature programs and 134°C FAST.
When the chamber is opened, the DOOR OPEN symbol blinks. When the chamber is locked by turning the lock knob clockwise, the display will show the START symbol, indicating the chamber has been closed correctly. Now you can select the program by pressing the symbol of the temperature you want to perform the sterilization in 121°C or the selected program is initiated by pressing the corresponding symbol “START.”
If the USB drive has not been inserted in the device, the USB symbol is not displayed in the bottom right corner of the screen, and a message about the missing USB drive is displayed.
The program data will not be saved. You can continue working without saving the data on the USB drive by pressing the YES field or stop working by selecting the NO, field to insert the drive in the port and start the program from the beginning. If you decide to continue working or the . field has been selected, the screen will display a chart of pressure during the entire pro- cess, with the current stage of the program indicated, while information on subsequent stages is displayed in the upper left corner of the screen.
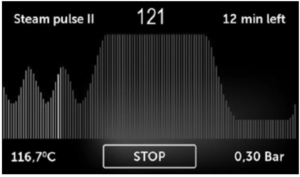
When a program is being run, the screen displays the temperature of the selected sterilization program 125°C or 134°C , the current temperature of the process chamber in the bottom left corner 116.7°C, the pressure currently in the chamber in the bottom right corner “0.30 Bar” while the process duration left is displayed in the upper right corner of the screen “12 Min Left.” This is the expected time, which may be extended due to the mass and type of charge.
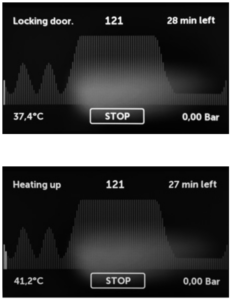 During the process, the “STOP” field is displayed instead of the START field, enabling you to stop the process at any time.The upper left corner of the screen displays the status of individual subsequent program stages, e.g.
– Chamber lock “Locking door”
– Process chamber heating “Heating up”
If the process was completed successfully, the display will alternately show information that the process has been completed and the load is sterile, and that the chamber may be opened.
After the process in 134°C FAST program tools are wet and hot.
By pressing the “FINISH” field, you return to the start screen.

![]()
ATTENTION! When the process is completed, the chamber, the tray and the load are hot. Maintain particular care and use protective gloves to remove the load, or wait until it cools.

![]()
Performing the sterilization process in the ENBIO S device does not affect material biocompatibility. All components of the device that are in direct contact with the sterilized load have no toxic, sensitizing or irritating effects.
Test Programs
By pressing the “TEST” field, you can go to the test program menu.
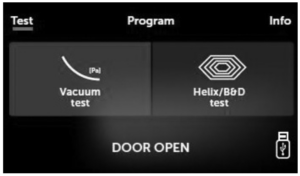 From here you can select the vacuum leak test program and the Helix/B&D test program. Select the appropriate program by pressing the relevant field on the display. When the process chamber is closed, the”DOOR OPEN” information changes to “START” and by pressing this field you launch the selected test program.
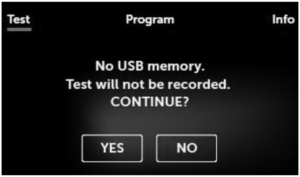
If the USB drive has not been inserted in the device, the USB symbol is not displayed in the bottom right corner of the screen, and a message about the missing USB drive is displayed.
The test program data will not be saved. You can continue working without saving the data on the USB drive by pressing the “YES” field or stop working by selecting the “NO” field to insert the drive in the port and start the test program from the beginning.
Program ENBIO S Bowie & Dick / Helix Vacuum leak test
Process temperature 134°C -
Pre-vacuum number 3 1
Sterilization duration 3.5 min -
Drying duration 3 min -
Total process duration 15 min 16 min
Vacuum Leak Test
The vacuum leak test may only be performed on a cold device, before work is commenced. The vacuum leak test enables testing the autoclave for the presence of leaks. The following are checked during the test:
- Vacuum pump performance.
- Pneumatic system sealing.
When the vacuum leak test program is selected and launched with the “START” button, the vacuum leak test progress screen is displayed. Information on pressure loss in the process chamber, and the test duration are displayed.
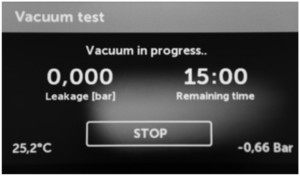
When the test program is completed, the following screens are displayed alternately.
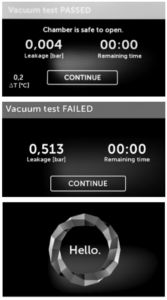
When the test program was completed successfully.
When the test program was not completed successfully.
After pressing the “CONTINUE” field, the start screen is displayed.
![]()
The process chamber must be completely dry and cold during the vacuum leak test. Otherwise, the vacuum leak test results may not be fully reliable, even if the sterilizer is fully functional. When the test is completed, a message with the results will be displayed. If the result is negative, check, clean or replace the seal, clean the front edge of the chamber and repeat the test. If the device fails the test again, contact your supplier or the manufacturer.
Bowie & Dick Test
Perform the Bowie&Dick test daily before commencing work, in order to verify that the device performs sterilization correctly.
The Bowie & Dick test, also known as the steam penetration test, imitates a small, highly porous load. It contains sheets of paper packaged in a small pack containing a chemical indicator (a physicochemical test).
This test assesses the device’s performance in sterilizing charges composed of porous objects:
- Pre-vacuum performance and steam penetration.
- Saturated steam temperature and pressure, reached for a specific time.
How to perform the test:
- Perform the test with an empty chamber, as per the EN 13060 standard.
- Place the Bowie-Dick test pack in the chamber, in the middle of the tray.
When the Helix/B&D test program is selected and launched with the “START” button, the program progress screen is displayed.
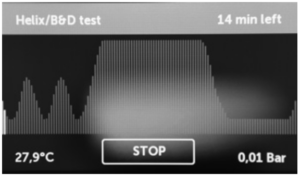
Process parameter information is displayed.
The Helix/B&D test program can be stopped at any time by pressing the “STOP” field.

When the test program is completed, the following screens are displayed alternately.
You can safely open the sterilizer’s process chamber.

When the process chamber is opened, the start screen is displayed.
– Remove the test pack.

WARNING! The package will be hot.
In order to interpret the test correctly, read the instruction provided by the test pack manufacturer.
– Open the pack and remove the chemical indicator from inside.

POSITIVE RESULT
Chemical indicator has changed color on a dark uniform over the entire surface.

NEGATIVE RESULT
In the middle of the test field remains clear because of the residual air in the middle of the device under test.
Any change of color, uneven coloring of the test, indicate the presence of air during the test cycle, caused by faulty operation of the sterilizer.
Helix Test
The Helix test represents sterilization of tools with A-type holes in accordance with the EN 13060 standard. It consists of a 1500 mm long tube open on one side, and a closed test capsule on the other. The indicator strip is located in the test capsule.
Helix test set
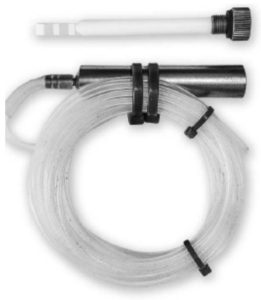
This test is used to assess the device’s performance in sterilizing recessed and porous loads, in particular:
- Pre-vacuum performance and the rate and uniformity of steam penetration.
- Saturated steam temperature and pressure, reached for a specific time.
How to perform the test:
- Perform the test with an empty chamber, as per the EN 13060 standard.
- Place the test strip in the capsule. Read the instruction provided by the test’s manufacturer.
- Close the capsule.
- Place the test in the middle of the tray in the chamber.
- After completing the test, open the sterilizer and remove the test.
 WARNING! The package will be hot.
In order to interpret the test correctly, read the instruction provided by the test pack manufacturer.
– Open the capsule and remove the test strip.
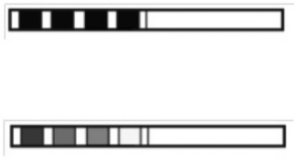
POSITIVE RESULT
All fields of the indicator strip became dark.
NEGATIVE RESULT
Part of the indicator strip did not change color on the dark due to the presence of air inside the capsule. Part of the indicator strip did not change color on the dark due to the presence of air inside the capsule.
A part of the indicator strip did not change color to the dark one due to the presence of air in the capsule.
An insufficient change of color of the indicator strip indicates the presence of air during the test cycle, caused by faulty operation of the sterilizer.
Information Menu
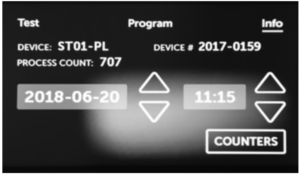
The information menu can be accessed by pressing the “INFO” field.
Here, information about the device type, serial number, number of per- formed processes, amount of free memory available on the USB drive for saving process data, and the service menu “COUNTERS” with the process counters for sealing, filter and the next service inspection can be displayed.
You can also change the date and time.

In order to set the date or time, touch the digits on the display. When a field is selected, it starts to blink 2016-02-22 and arrows used to change values are displayed, up (arrow on top) and down (arrow on bottom). This way you can correctly set the date and time.

Pressing the number again confirms it, and you can change another parameter.
We can choose the language in the same way by clicking on the shortcut.
Counters
The ENBIO S sterilizer counts the number of performed processes and uses it to notify you about the recommended dates of replacing elements subject to wearing down, and about required service inspections.
No. Name Recommended frequency of replacement (cycles) Yellow (Approaching the replacement date, number of cycles) Red (Exceeded replacement date, number of cycles)
1. HEPA filter after 1000 from 980 after 1000
By pressing the “COUNTERS” field, you go to the counter display.
The number of performed processes is on the left hand side, and on the right hand side – the number at which the given element should be replaced or a service inspection performed, example: “980/1000.”
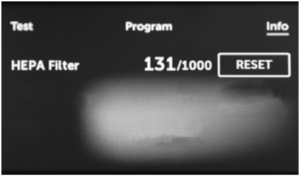
After replacing a filter or seal, the values can be reset by the user by pressing the “RESET” button. The service inspection value can only be reset by an authorized service.

When approaching a value when re- placement of an element or a service inspection is recommended, the values will be highlighted in yellow.

If the limits are exceeded, the value will be displayed in red.
During regular operation, info screens concerning replacement of individual elements or required service inspection are displayed alternately.
Counter values displayed in yellow or red do not prevent the device from operation. However, exceeding the required inspection date may significantly affect the device’s operation and the load sterilization process.
For replacing individual elements, please contact the manufacturer or supplier.
Restarting
Restarting the device is forced when a process is aborted by the user by pressing the “STOP” field, or when power or water supply is lost.
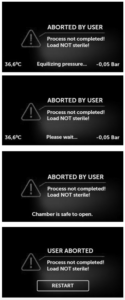
If the “STOP” field is selected, the following messages will be alternately displayed, notifying you that the process has been aborted by the user and pressure is being equalized in the process chamber, and a message notifying you that the process has not been completed correctly and the load is not sterile.
When the pressure is equalized in the process chamber, the following messages will be displayed alternately on the screen.
You can freely open the device now.
The following screen will be displayed when the chamber is opened.
By selecting the “RESTART” field, you can return to the start screen.
However, in order to do so, you must enter the 4-digit security code 0000.


If the code is entered incorrectly, a message will be displayed on the screen.
Enter the code again. The arrow enables cancelling incorrectly entered digits.
When the code is entered correctly, the start screen will display.

As always if you have any questions about this process or anything else please feel free to contact us and take advantage of our “FREE TECH SUPPORT.”
We also offer FREE VIRTUAL TECH SUPPORT to “See and Talk” with a “Real Time Live Technician” for any problems you may be in need of help with.
You can also use our “FREE MAINTENANCE PROGRAM”. Take the guesswork and worrying about what unit is due for maintenance and which maintenance cycle it is time for. We will keep track of all your autoclaves and let you know when it’s time for anything.
The Enbio S Pre/Post Vacuum autoclave is available for purchase here
Any parts you require for your Enbio S can be purchased here.
