W&H Lexa Mini Error Codes 10-70
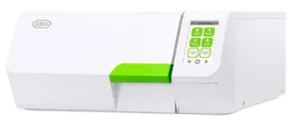
Understanding the error codes that may arise while using any autoclave is crucial for ensuring its optimal performance and reliability. So in this article, we will delve into some of the various error codes of the W&H Lexa Mini. Specifically, we’ll be going over Error Codes 10 – 70. These are not the error codes that we’ve previously shown in our original article here. These is an updated version of W&H’s official troubleshooting manual with new types of error codes. So in this article, we’ll go over the details of what each code means, as well as actions you can take to troubleshoot them.
We have a video available here on our YouTube channel going over these error codes if you’re a visual learner. If you have any questions about these error codes, the W&H Lexa Mini or anything else, please give us a call at 704-966-1650 Option 3 for our Free Tech Support Line.
Error Codes
Error Code 10
Description
Mains voltage or 24V error during the cycle
Possible Cause 1:
Mains cable failure or disconnected.
Actions
Check that the mains cable is properly plugged. Check the mains cable for electric continuity.
Possible Cause 2:
Sterilizer switched OFF during a cycle.
Actions
Wait until the error phase on the screen is finished.
Possible Cause 3:
Electric failure in the building system.
Actions
Connect the sterilizer to a dedicated circuit as reported in the user instruction.
Check the electric power in the building.
Check the electric power at the wall plug.
Possible Cause 4:
24 V power unit failure.
Actions
Check the 24 V power unit.
Error Code 11
Description
Software error during update
Possible Cause:
Software update failure.
Actions
Repeat the update.
If the failure persists, call our Free Tech Support Line at 704-966-1650 Option 3.
Error Code 12
Description
Microprocessor Error
Possible Cause:
Bad communication with the mains load control microprocessor.
Actions
Update – Reinstall the software.
If the problem persists, replace the main board.
Error Code 13
Description
Microprocessor Error
Possible Cause:
Bad communication with the mains load control microprocessor.
Actions
Update – Reinstall the software.
If the problem persists, replace the main board.
Error Code 20 to 49
Description
Internal voltage out of range
Possible Cause:
Sensor Failure
Main Board Failure
Actions
Disconnect progressively all sensor cables from the main board. Check the ERRORS screen:
- If the error persists, replace the main board
- If the error disappears, replace the sensor/cable that causes the error.
Error Code 50, 51
Description
Mains voltage out of range
Possible Cause:
Mains voltage out of range
Power Board Failure
Actions
Check the Cycle Info screen.
The mains voltage must be between 180 and 264 volts (220 V ac version) or between
90 and 132 volts (110 V ac version) and must be stable.
If the mains voltage is bad (out of range or unstable), check the mains supply voltage with a multimeter and compare it with the reading of the Cycle Info screen.
If the values are different, replace the power board, otherwise check the electric supply.
Error Code 53
Description
Current consumption of the sterilizer out of the range
Possible Cause:
Electric 230 V-110 V supplied component failure (short- circuited or out of range).
Power board failure.
Actions
In the Component Test menu, check the resistance of all the supplied components (heaters, vacuum pump, water pump).
Compare the values shown by the sterilizer with those measured with a multimeter:
- If the values are different and those given by the multimeter are in the range while those given by the sterilizer are out of range, replace the power board.
- If all values are the same and a component gives an out-of-range value, replace the component.
Error Code 60
Description
Low voltage on 24 V DC circuit.
Possible Cause 1:
Failure of a 24 V-supplied component or in its connection cable to the main board.
Actions
Disconnect progressively all components from the main board. Check the ERRORS screen:
- If the error disappears, replace the component/cable that causes the error.
- If the error persists, see next step.
Possible Cause 2:
Failure of the 24 V supply unit.
Actions
Check the 24 V power unit.
Error Code 61
Description
Too high voltage on 24 V DC circuit.
Possible Cause:
Failure of the 24 V supply unit.
Actions
Check the 24 V power unit.
Error Code 70
Description
24 V DC overcurrent.
Possible Cause 1:
24 V component failure.
Actions
If the error is permanent disconnect progressively all 24V components/sensors cables from the main board.
Check the ERRORS screen:
- If the error disappears, replace the component/cable/sensor that causes the error
- If the error persists, replace the main board.
Possible Cause 2:
Sensor failure.
Actions
Call service. You can call our Free Tech Support Line at 704-966-1650 Option 3.
Possible Cause 3:
Door locking motor failure.
Actions
Call service. You can call our Free Tech Support Line at 704-966-1650 Option 3.
As always if you have any questions about this process or anything else please feel free to contact us and take advantage of our “FREE TECH SUPPORT.”
We also offer FREE VIRTUAL TECH SUPPORT to “See and Talk” with a “Real Time Live Technician” for any problems you may be in need of help with.
You can also use our “FREE MAINTENANCE PROGRAM”. Take the guesswork and worrying about what unit is due for maintenance and which maintenance cycle it is time for. We will keep track of all your autoclaves and let you know when it’s time for anything.


