Preparing a Scican Statclave G4 For Use Leave a comment
Preparing a Scican StatClave G4 for Use*
In this article we want to share Scican Ltd.’s proper procedures for preparing a StatClave G4 Chamber Autoclave for use. We will cover powering the unit on, connecting it, installing the USB storage device, and the various options for filling the water reservoirs for normal operation.
Once the STATCLAVE has been correctly installed, and before using it for the first time, make sure BOTH the clean water and Venturi reservoirs contain distilled water. The STATCLAVE uses the Venturi system to generate vacuum draws at the beginning and end of each cycle. Both reservoirs must contain the minimum required water levels for the unit to function. And if you just want to talk to someone, call our Free Tech Support at 704-966-1650 Option 3.
IMPORTANT! DON’T run the STATCLAVE without the chamber rack in place.
Start by Powering On the Unit
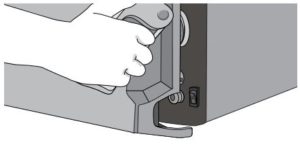
IMPORTANT! Keep the door open when powering the unit ON for the first time to allow the unit to accurately read the local atmospheric pressure. If the unit misreads the pressure, it may lock the door.
Connecting the Statclave G4
Follow the screen prompts to connect your STATCLAVE using either WiFi or an Ethernet cable connection. This will automatically set the time and date for your unit.

Now Fill the Clean Water Reservoir…
Open the CLEAN WATER RESERVOIR located on the top right of the unit. Using a large container, fill with distilled water to the maximum fill level line or until you hear 3 BEEPs.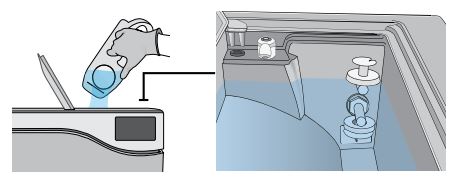
…And Fill the WASTEWATER RESERVOIR
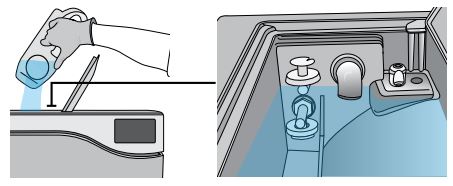
Open and fill the WASTEWATER RESERVOIR to the maximum fill level.
Finally, Install the USB Storage Device and Bacteriological Filter
CAUTION! HOT CHAMBER – This unit’s Stand-by mode is preset to maintain a hot chamber.
Open the door, plug the USB storage device into the USB port…
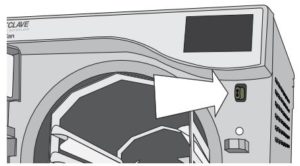
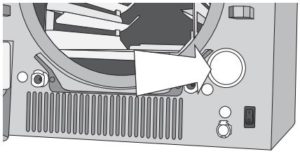
…and make sure the bacteriological filter is secured in place.
NOTE: Check your national and local guidelines for any additional protocols and tests required before using your unit.
Filling the Water Reservoirs
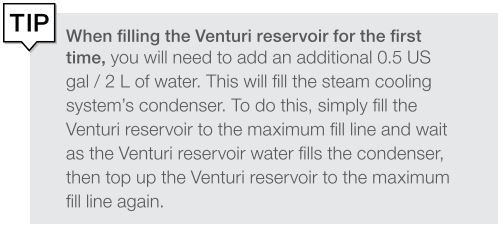
Normal operation of the STATCLAVE requires a minimum amount of distilled water in BOTH the clean water reservoir and Venturi reservoir.
To fill the Venturi reservoir:
Open the Venturi reservoir lid located on the top left of the unit.
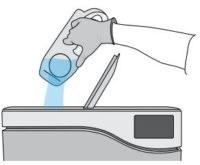
Fill it with distilled water to the maximum fill line indicated in the reservoir.
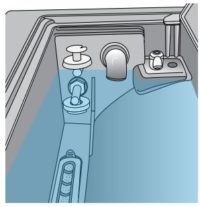
Setting the Water Reservoir Filling Mode
Your STATCLAVE’s default filling option is MANUAL. If you are manually filling the reservoir, you do not need to change the unit’s fill option settings.
If you are connecting your STATCLAVE to an external filling device such as a Vista Pure water purification system or external water tank and auxiliary pump, make sure your unit is set to the AUTOMATIC filling mode.

To fill the clean water reservoir, there are four different methods:
- Manual filling using RESERVOIR TOP.
- Manual filling using the FRONT QUICK CONNECTOR.
- Automatic filling using VISTA PURE SPECIALIZED WATER FILTRATION SYSTEM with accumulation tank.
- Automatic filling using an EXTERNAL WATER TANK AND AUXILIARY PUMP.
Manual Filling Using Reservoir Top
1- With the unit powered ON, flip open the clean water reservoir lid located on the top right of the unit.
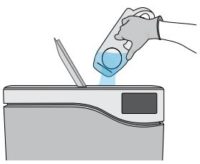
2- Using a large container, fill with distilled water to the maximum fill line or until you hear 3 BEEPs.
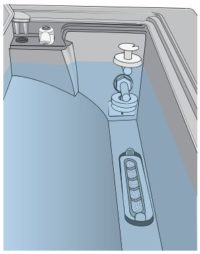
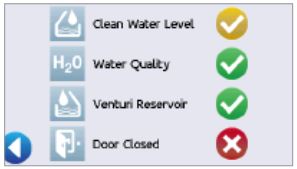
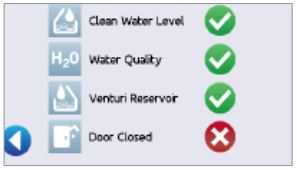
3- With the door open, access the LCD home screen and select any cycle to view the pre-cycle information screen.

4- The clean water level check mark will turn yellow when the minimum water level is reached and green when the reservoir is filled to the maximum level.


Manual Filling Using Quick Connector at Front of Unit
The front fill quick connector is for the regular refilling of the clean water reservoir. The Venturi reservoir does not have a front fill quick connector because it is only filled on installation or after cleaning.
1- To use this method, you will need the manual fill container (0.5 US gal / 2 L) with quick connect and tubing (sold as an accessory).
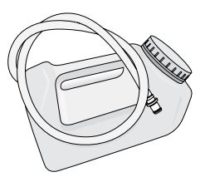
2- Fill the container with distilled water, keeping it horizontal.
3- With the unit powered ON, connect the tube’s quick connector to the unit’s clean water fill port at the front.
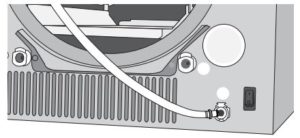
4- Hold or place the manual fill container at a level higher than the unit’s fill port and loosen the cap on the container to allow water to flow into the tank.
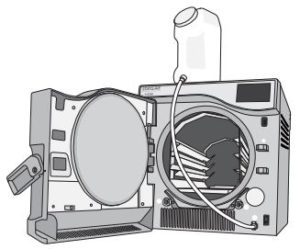
5- With the door open, access the LCD home screen and select any cycle to view the precycle information screen.

6- The clean water level check mark will turn yellow when the minimum water level is reached.

7- Repeat this procedure a second time to fill the water reservoir to max level. (Each fill takes 4 minutes.) And continue until the clean water level indicator turns green and you hear 3 BEEPs.


Automatic Filling Using a Vista Pure Specialized Water Filtration System with Accumulation Tank
When connecting your STATCLAVE to an external filling device such as a Vista Pure specialized water filtration system, make sure your unit is set to the AUTOMATIC filling mode. (See “Setting the Water Reservoir Filling Mode” Above.)
1- Remove the plug from the automatic fill port (A) at the back of the unit.
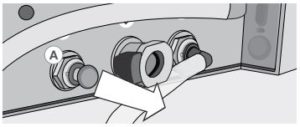
2- Connect the water filtration system’s Teflon tube (or other suitable tube) to the automatic fill port (A) at the back of the unit.
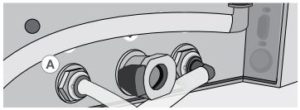
3- Ensure the tube runs freely from the water filtration system. It should not be sharply bent, crushed, or obstructed in any way.
4- Open the valve on the water filtration system (C) to fill the accumulation tank.
5- Open the accumulation tank’s valve (B) to facilitate the flow of water to the STATCLAVE.
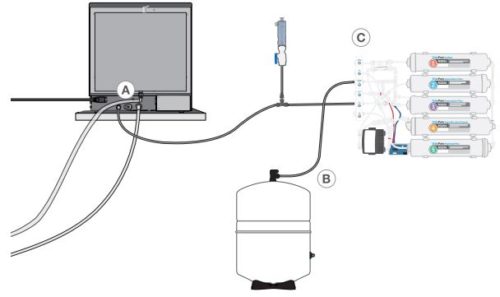
6- Go to the home screen and select any cycle to activate the filling system.
IMPORTANT! Before you activate the AUTOMATIC filling mode, make sure the external tank has been filled with high quality distilled water. Also remember to open the tap on the external tank or filtration system, if required.
IMPORTANT! When selecting an automatic filling option, it is best to use a direct-to-drain wastewater connection. The use of an external wastewater bottle will require careful monitoring and frequent emptying.
IMPORTANT! Scican Ltd recommends a High quality distilled water with a conductivity of 6.4 ppm / 10 µS/cm or less.
Automatic Filling Using External Water Tank and Auxiliary Pump
When connecting your STATCLAVE to an automatic filling system such as an external water tank and auxiliary pump, make sure your unit is set to the AUTOMATIC filling mode. (See “Setting the Water Reservoir Filling Mode” Above).
An input hose can be connected to the STATCLAVE from an external tank that uses an automatic water pump to feed the internal tank automatically when it reaches the MIN level. Be sure to monitor the water level of your external tank. The STATCLAVE unit does not monitor the water level in the external tank and the auxiliary water pump should not run dry.
To use this method, you will need the STATCLAVE automatic fill pump shown below (sold as an accessory), and an external tank with a minimum diameter opening of 2” (50mm) through which you can insert the pump.
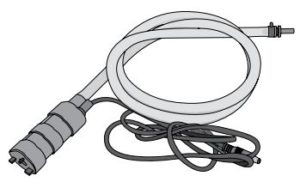
To connect the automatic fill pump to the STATCLAVE, follow these steps:
1- Remove the plug from the automatic fill port (A) at the back of the unit.
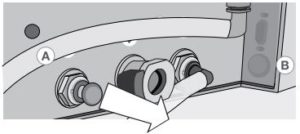
2- Connect the fitting at the end of the pump’s tubing to the automatic fill port (A).
3- Connect the automatic fill pump’s power source to the power connection (B) located at the back of the unit.
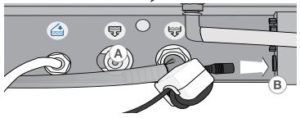
4- Fill the external tank with distilled water.
5- Place the submersible automatic fill pump (C) in the external tank.
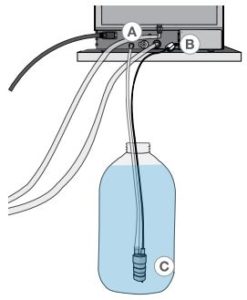
6- Go to the home screen and select any cycle to activate the filling system.
See our other posts about Scican Statclave G4 Setup and Operation:
Installing a Scican Statclave G4 Chamber Autoclave
Scican Statclave G4 Proper Instrument Loading
Running a Cycle on a Scican Statclave G4
*All information taken from SciCan STATCLAVE G4 Chamber Autoclave Operator’s Manual 95-115362 CA EN R3
As always if you have any questions about this process or anything else please feel free to contact us and take advantage of our “FREE TECH SUPPORT.”
We also offer FREE VIRTUAL TECH SUPPORT to “See and Talk” with a “Real Time Live Technician” for any problems you may be in need of help with.
You can also use our “FREE MAINTENANCE PROGRAM”. Take the guesswork and worrying about what unit is due for maintenance and which maintenance cycle it is time for. We will keep track of all your autoclaves and let you know when it’s time for anything.
