

Coltene BioSonic UC150 Ultrasonic Cleaner Operating Instructions Leave a comment
These Coltene BioSonic UC150 Ultrasonic Cleaner Operating Instructions* are a quick guide to follow up on our Intro to the Coltene BioSonic UC150 Ultrasonic Cleaner. In this article we will cover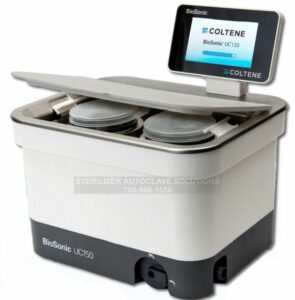 the basics of what it is used for, safety, setup, and operation. And if you just want to talk to someone, call our Free Tech Support at 704-966-1650 Option 3.
Biosonic UC150 Overview
An Essential Part of Your Infection Control System
The BioSonic® Ultrasonic Cleaner is a high quality, extremely efficient and popular ultrasonic cleaning system in dentistry. Developed specifically for the dental industry, BioSonic units feature unique product design to optimize time and safety in the office or laboratory.
BioSonic is a complete ultrasonic cleaning system, with a full line of cleaning solutions and unit accessories which provide you with the flexibility to efficiently clean instruments, prostheses, burs and other appliances.
What is Ultrasonic Cleaning?
Ultrasonic Cleaning is a process created by high frequency sound waves. The sound waves, enhanced by specially formulated cleaning solutions, create high energy cavitation. During cavitation, millions of tiny bubbles form and then collapse or “implode,” releasing enormous amounts of energy and shock waves which scour the surface of instruments, appliances and other devices placed in the cleaning solution. This powerful scouring action reaches into minute crevices, which manual brushing cannot reach. The combination of energy and specially formulated solutions make ultrasonic cleaning the most effective method for removing gross and microscopic debris.
Intended Use:
The BioSonic® UC150 Ultrasonic Cleaner is intended for cleaning medical instruments by the emission of high frequency sound waves.
Safety Information for the BioSonic UC150
NOTE: FAILURE TO COMPLY WITH THESE CAUTION AND WARNING STATEMENTS MAY RESULT IN INJURY TO PERSONNEL OR EQUIPMENT DAMAGE!!!
| Do not operate the unit without sufficient solution in the tank. Do not use water alone as the carrier bath. Water is not a satisfactory coupling agent unless a wetting agent is used. For best results, use BioSonic General Purpose, BioSonic Germicidal Cleaner or BioSonic Enzymatic Ultrasonic Cleaning solutions. |
| Do not place objects directly on bottom of tank because they may block cavitation and cause buildup of heat in the transducer causing premature failure. Use only BioSonic UC150 accessory baskets, cassette racks or beakers to hold items. |
| Do not restrict airflow. Provide adequate ventilation by maintaining at least 2 inches clearance in the back. |
| Do not subject the unit to shock or impact. |
| Do not immerse the unit in water. |
| Keep the display surface dry for proper functioning of device. |
| This product is intended for use only by trained healthcare professionals. |
| Use this product in accordance with the instructions in the owner’s guide. |
| Unspecified or improper use of this product may impair safety protection. |
| Before cleaning items of considerable value ultrasonically, consult the item’s manufacturer for cleaning precautions. |
| The power off selection from the keypad does not turn off main power to the unit. Unplug the device from the power outlet to shut down the device. |
| This equipment may cause radio interference or may disrupt the operation of nearby equipment. It may be necessary to take mitigation measures such as reorienting or relocating the unit or shielding the location. |
| Never drain tank manually discarding solution as this may cause the unit to stop working properly. |
| Use only the supplied power cord or equivalent rated for 105°C. |
| Do not disassemble the unit. There are no user serviceable parts inside. |
| Keep unit covered to reduce airborne contaminants. |
| Do not place fingers or hands in the ultrasonic tank while in operation. |
| Ensure appropriate decontamination in case of spillage of hazardous material on or inside of the equipment through device openings. |
 Operation for long periods of time will cause the cleaning solution to get very hot. To avoid scalding, do not place hands in the solution or spill any onto you. Be careful when removing an item from the tank as it may also be hot.
Unpacking the BioSonic UC150 Ultrasonic Cleaner
Remove your BioSonic unit from the shipping container and inspect the unit for any possible damage which may have occurred during shipping.
Check the serial number of the unit (found on either the underside or rear of the unit) with the number on the shipping carton. If they are not identical, contact your dealer.
Fill out the warranty card and mail to Coltène/Whaledent within 10 days of receipt.
Installation and Setup
General Setup
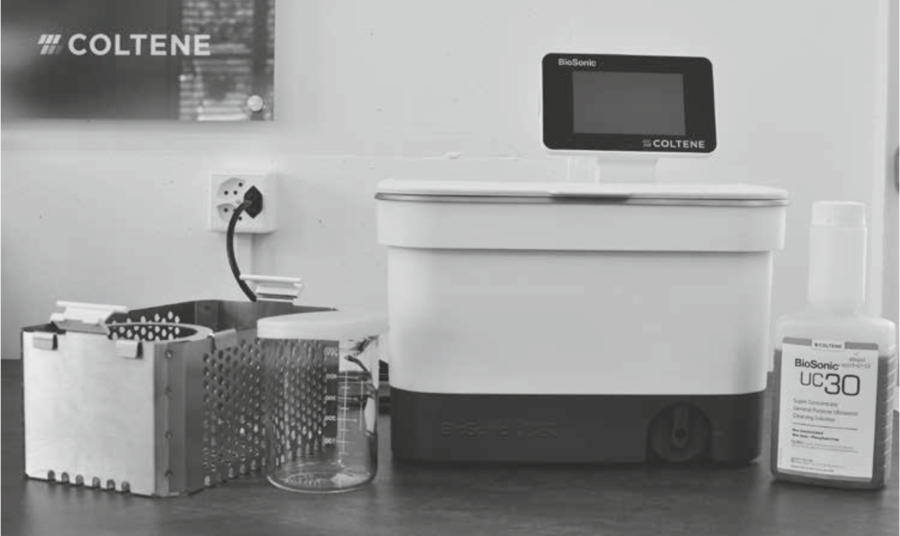
Select your desired location for the cleaner. It should be on a solid level top and in close proximity to a sink or to waste lines to facilitate draining. The hose supplied with the unit will allow you to place the unit on the left side of the sink or connect directly to the waste line.
Connect one end of the hose to the drain valve (Figure 4) and place the other end in the sink. If desired, have your plumber connect the hose directly to the waste line with the appropriate fittings.
CONNECT THE DISPLAY. Attach the connector on the bottom of the display module to the connector on the top right-hand corner of the unit. Press the display module down carefully until it snaps into the right position.
PLUG IN THE UNIT. Attach the UC150 electrical cord at the lower back of the unit and plug into a three-wire grounded AC outlet (in accordance with local regulations) (Figure 9). It is recommended that the unit be plugged into a Ground Fault Circuit Interrupter (GFCI) outlet.
Installation Instructions for Recessing Unit
Tools Required:
- Electric Drill
- Drill bit to drill a hole large enough to accept your reciprocating saw blade
- Reciprocating saw and blade
NOTE: This Ultrasonic Cleaner must be installed by an experienced equipment manager or licensed contractor. Be sure to follow local building codes.
NOTE: Before you begin please read and understand the safety instructions provided by the manufacturer of the tools required for installation.
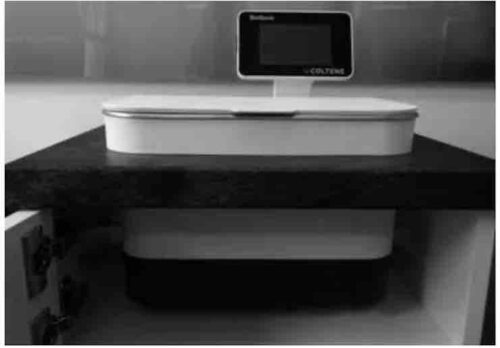
- Select the desired location for the cleaner. You will need at least 19 cm (7.5 inches) clear vertical space below the top of the counter to accommodate the tank enclosure. The countertop must be flat and level. Make sure that you are not selecting a location which will interfere with drawers or vertical partitions between cabinets.
- Tape the enclosed template down to the counter top in the desired location. Make sure that the “front of the unit” is closest to the user.
- Cut along the “cut line” with a jigsaw or other reciprocating saw.
- Clean away dirt or sawdust around the opening, and remove scrap wood.
- Attach the rubber gasket on the housing for better seating between bezel and counter top.
- Lower unit into opening. Be sure that the printed BioSonic logo on the housing faces the user. (See figure below)
- The hose supplied with the UC150 will allow you to dispose of the waste in accordance with your local, state and/or federal regulations.
- Opening the drain valve will allow you to empty the solution into a waste storage container for disposal in accordance with your local, state and/or federal regulations.

Power should not be supplied to the unit until all interconnections between the display and tank enclosure and any accessories are securely connected.
This unit must be properly grounded. Failure to properly ground unit may result in serious injury.
Power Up Settings
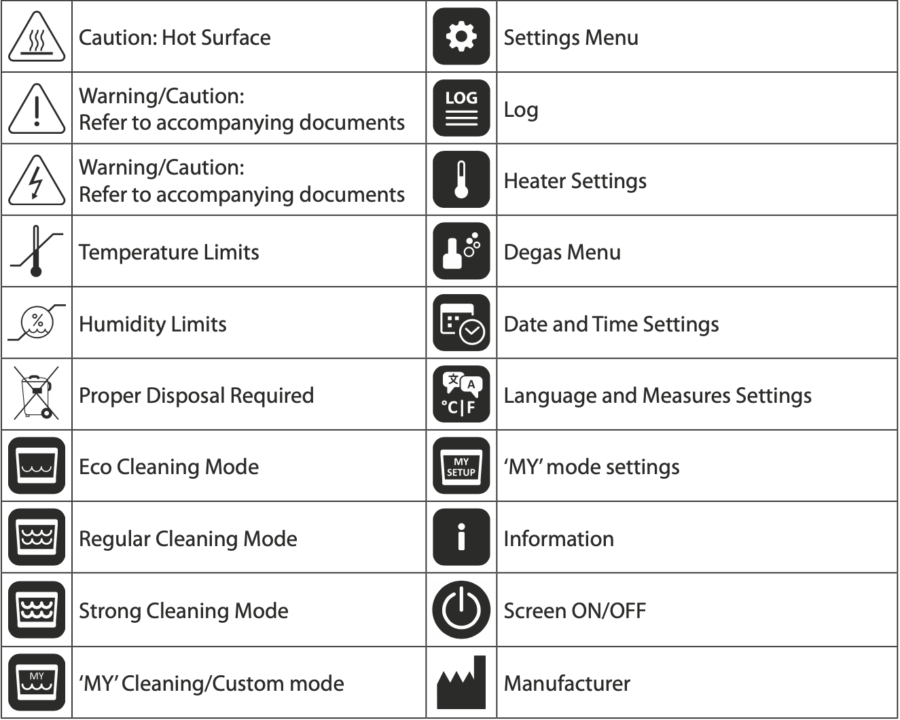
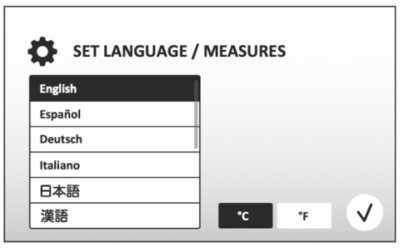
SELECT A LANGUAGE AND TEMPERATURE UNIT: Select the language for your appropriate region from the drop down list. ![]()
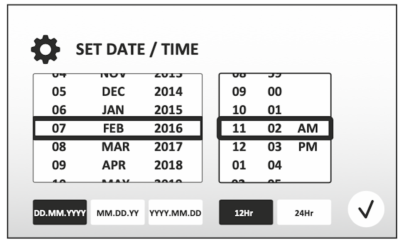
SET THE DATE AND TIME: Set the date and time with preferred format by using the drop down list and format buttons.
User can choose one of the three date formats: DD.MM.YY – MM/DD/YY or YY-MM-DD
![]()
SETUP COMPLETE. The display will now show the main screen once setup is completed in the language of your choice. Your UC150 is now setup and ready to use!

Filling Instructions
Ensure that the drain handle (see figure below) is fully rotated anti-clockwise to the close position.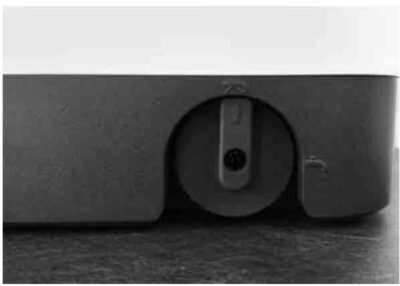
Fill the unit with warm water to the fill line indicator (see figure below).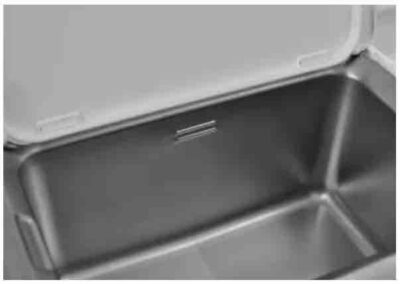 Ensure that the water level is filled up to the minimum line and does not exceed maximum line while using accessories like beakers or baskets.
Pour the required amount of ultrasonic cleaning solution (eg. BioSonic General Purpose UC30, BioSonic Enzymatic Ultrasonic Cleaner UC32) and water into the tank.
Change the solution in the tank daily or sooner if it appears soiled or discolored. When beakers are used, change the solution in the beaker after each use.
Drain unit by fully rotating the drain handle clockwise to the “Open” position and allow solution feedback to empty into sink or waste system. Rinse tank and fully rotate the drain handle anti-clockwise to the “Close” position. Never drain tank by manually discarding solution as this may cause the unit to stop working properly.
NOTE: Never operate the unit without solution. Operating a dry tank will void the warranty. Do not place objects directly on bottom of tank. Always use accessory baskets, cassette racks or beakers.
Degassing
Degassing the solution eliminates large air bubbles that interfere with the cleaning process and is necessary each time new solution is added to the tank.
- PRESS THE DEGAS icon on the main screen. (see figure below)

- Select type of solution to log solution used or degas only and press the check mark icon to degas. (see figure below)

- The UC150 will begin to cycle on and off during the degassing process. The timer will count down from five minutes.
- DEGAS COMPLETE! Once the timer reaches zero, the words” Degas Complete” will be displayed. Your solution is now ready for use. Press the Home icon to return to the main screen. (see figure below)

Operating Instructions
Mode Selection
Four modes are available to choose from on the main screen – 3 preset modes: ECO: for light loads; REGULAR: for medium loads; STRONG: for heavy loads and “MY” mode for customized operation. (see figure below)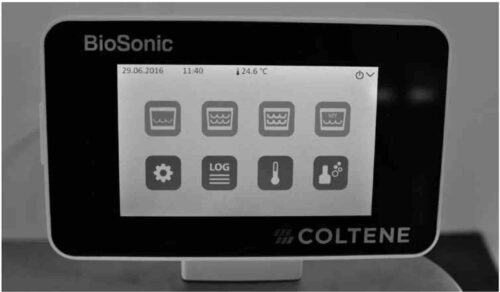


Heater operation
Activating the heat feature
The UC150 model is equipped with a heater to accelerate heating of the solution in the tank.
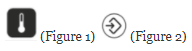
NOTE: The temperature in the tank is displayed in the top bar of the LCD screen. Pressing the black and white thermometer key (figure 1) to activate this feature will bring up a new screen on the display. The first time the feature is activated, the user must enter the activation code. Press the accept key (figure 2) once code is entered. The heating function will now be available to use.
*In order to obtain the activation code, visit www.coltene.com or email customer service at info.ch@coltene.com or info.us@coltene.com
Set the Desired Temperature
- Press the thermometer button (Figure 1). Set the temperature between 25°C (75°F) and 60°C (140°F)
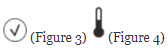
- Select “HEATER ON” to activate heating function. Press the check mark button to accept the temperature.
- A white thermometer symbol (Figure 3) will be displayed on the top of the main screen if heater is selected ON. The heater will now Function during selected cleaning cycle.
- Select “HEATER OFF” if heating is not desired.
- A blinking white thermometer symbol (Figure 3) symbol on the main screen is displayed while the heating is in progress during a cleaning cycle. Current temperature information will always be displayed in the top of the LCD display.
 The heating function of the UC150 (if enabled) takes place until set temperature only .Through prolonged use, the natural cavitation process will continue to heat the solution beyond the desired temperature. When this happens, the unit is still functioning properly.
NOTE: The user can change the temperature unit from C to F using the settings menu.
Cleaning Methods
In Tank
Basket Cleaning: Place parts to be cleaned into the basket or use cassettes. (see figure below) Then place the basket directly into the main tank containing BioSonic General Purpose, Germicidal, or Enzymatic Cleaner. Follow dosage instructions per cleaning solution label. 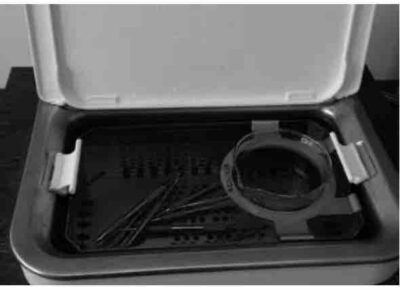
In Beaker
For specialized item cleaning (e.g. prostheses, burs): Place item into a beaker and add desired cleaning solution (e.g. BioSonic Cement Remover or BioSonic General Purpose) according to the product directions. Suspend the beaker in the tank by using the beaker holder and place the beaker positioning ring around the beaker so that the bottom 2/3rd is suspended in the main bath.
NOTE: Beaker holder is to be used in conjunction with the basket (see figure below). Use caution when removing basket if beakers are left in place.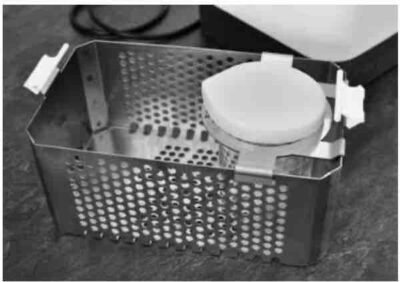
10. Accessory Use
- BIOSONIC CASSETTE BASKET: The UC150 basket cleans large volumes of instruments and increases instrument processing efficiency. Place items in an instrument cassette or directly at the bottom of the basket. Place basket in tank and clean for desired time. After cleaning, rinse the basket and instruments thoroughly under running water.
- BEAKER HOLDER: The beaker holder holds a 600ml glass beaker to clean small parts, burs, prostheses. Place the Beaker Holder on the basket and insert the basket into the tank. Place positioning rings around the beaker so that the bottom 2/3 of the beaker is suspended in the main bath. Clean for desired time.
Data Log
- VIEW LOG: Select the Log button (Figure 1) from main menu (see photo below) to view cleaner data log.
- DATA DOWNLOAD: Insert a USB stick in the USB port provided on the left of the UC150 device display. To download cleaner use data onto the USB device, press the download (Figure 2) key. Press the check mark (figure 3) key to confirm data download. Monthly data log files will be available in .csv format on the USB file.

Maintenance
Cleaning
All components should be cleaned each day by wiping with a soft cloth moistened with a commercially available mineral deposit remover followed by cleaning with isopropyl alcohol or a mild disinfectant.
Do not use petroleum based solvents, iodophors or phenolic based products. Iodophors and phenolics can stain the surface of the unit.) Clean up all liquid spills immediately. Rust deposits on tank can be cleaned/ removed with a commercially available stainless steel cleaner.
Stainless Steel Cleaning
Allowable:
- Wash with a clean cloth or rag soaked with warm water and mild soap or liquid dish detergent.
- Always clean in the direction of the original polish lines.
- Always rinse well with clear water (2 or 3 times) after cleaning. Wipe dry completely.
- Specialized household stainless steel cleaner may also be used.
Avoid:
- Do not let dirt accumulate.
- Steel or stainless steel wool or scrapers to remove stubborn debris.
- Harsh or abrasive cleaners.
- Chemicals harmful to stainless steel not limited to but including products that contain chloride, fluoride, iodide or bromide.
- Cleaners that contain bleach.
In case of questions regarding compatibility of decontamination or cleaning agents please contact the manufacturer or your supplier.
Inspecting the Power Cord Periodically
Check the power cord for damage and see that the connectors at both ends of the cord are fully seated.
Changing the Fuse
- Remove the power cord from the wall outlet first and then from the power cord receptacle on the rear of the unit.
- The fuse compartment is located directly above to the power cord receptacle. To access, take a small, flat-headed screwdriver to the tabs on the fuse holder. Apply slight pressure to release the fuse holder (Figure 9).
- Gently remove the fuses from the fuse holder.
- Examine the fuses (Figure 10). If blown, replace with a fuse that matches the unit’s voltage and current. If fuse appears to be in good condition return the unit to your dealer or Coltène/Whaledent.
- Plug the power cord into the power cord receptacle on the rear of the unit. Then plug the power cord into the wall receptacle.
Technical Details
- Intended for indoor use.
- Maximum altitude 2000m.
- Recommended storage and transport temperature:

- Temperature during operation:
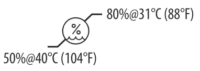
- Relative humidity:
- Main supply voltage fluctuations not to exceed ± 10% of the nominal voltage.
- IEC -60664-1 Pollution degree 2.
Electrical Information
- Power Supply Input: 100V – 240V AC / 50 ~ 60 Hz
- Transducers: 2
- Operating Frequency: 45 kHz – 47.5 kHz
- Fuse Specifications: 2 Fuses FST, 5 × 20 mm, Slow Blow, 250VAC, 5A, IEC 60127-2 Sheet 3
| Max Power @ Input Voltage | |||
|---|---|---|---|
| Input Voltage | Max Power Without Heater* | Max Power With Heater* | Max Current |
| 100 V | 160 W | 440 W | 4.4 A |
| 115 V | 160 W | 530 W | 4.6 A |
| 230 V | 160 W | 530 W | 2.3 A |
| 240 V | 160 W | 560 W | 2.3 A |
| *average over a sweep period | |||
- EMC Class A: Suitable for use in all establishments other than domestic and those directly connected to a low-voltage power supply network which supplies buildings used for domestic purposes.
- Class I electrical equipment per IEC 61140.
- Transient over voltages category II per IEC 61010.
Mechanical Information
| Tank Capacity | 6.6 L (1.75 US gal) |
| Use Capacity | 5.7 L (1.5 US gal) |
| Overall Dimensions | L × B × H = 34.5 × 27.6 × 35.5 cm (13.6” × 10.8” × 14”) (w/ display) |
| Tank Dimensions | 28.7 × 16.0 × 17.8 cm ( 11.3”× 6.3”× 7”) |
| Above countertop surface Below Countertop surface | 34.5 × 27.6 × 24.4 cm (13.6” × 10.8” × 9.6”) |
As always if you have any questions about this process or anything else please feel free to contact us and take advantage of our “FREE TECH SUPPORT.”
We also offer FREE VIRTUAL TECH SUPPORT to “See and Talk” with a “Real Time Live Technician” for any problems you may be in need of help with.
You can also use our “FREE MAINTENANCE PROGRAM”. Take the guesswork and worrying about what unit is due for maintenance and which maintenance cycle it is time for. We will keep track of all your autoclaves and let you know when it’s time for anything.