

Installing a Midmark M11 Self-Contained Steam Sterilizer Leave a comment
In this article, we want to show you the steps Midmark gives to install a Midmark M11 . And if you just want to talk to someone, call our Free Tech Support at 704-966-1650 Option 3.
Installing a Midmark M11 Self-Contained Steam Sterilizer General Instructions*
In this article we want to share Midmark’s proper procedures for installing their M11 Self-Contained Steam Sterilizer. We will cover Operating Environment, Location Requirements, Electrical Requirements, Connecting the Power Cord, and User Settings for normal operation.
Let’s start with Operating Environment
| Ambient Temperature Range: | 68°F to 104°F (+20°C to +40°C) |
| Relative Humidity: | < 80% (non-condensing) (Pollution Degree 2, in accordance to IEC664) |
| Normal Operating Altitude: | < 9842 ft. (3000 m) above sea level |
| Device approved for INDOOR USE ONLY. | |
| Device to be operated in a relatively dust-free environment. (Pollution Degree 2, in accordance to IEC664) | |
| Device should be connected to a power source with over-voltage limits less than 1500 watts from mains to ground. (Installation Category II in accordance to IEC664) | |
| The M9 / M9D and M11 will emit 5000 BTU / HR during operation. | |
Next is Location Requirements
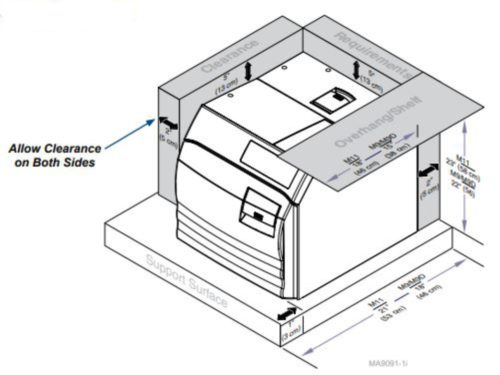
Support Surface
- Material should be water-resistant material. (Ex. laminate, stainless steel, stone, etc.)
- Surface must be level to ensure chamber fills with correct water level. Improper water level in the chamber could cause a sterilizer malfunction.
- Surface should meet minimum dimensions listed below:
Dimensions
- Depth (front to back) M11 – 21” (53 cm)
Clearance Requirements
To ensure proper air circulation, and to allow access to the reservoir fill port and drain coupling, adhere to the minimum clearance requirements listed below. If the sterilizer will be operated in continuous cycles, locate sterilizer where steam will not damage materials or equipment in the surrounding area.
- Back of Unit – Back Wall…………………………… 2” (5 cm)
- Front Support Surface – Front Sterilizer…….. 1” (3 cm)
- Sides of Unit – Side Wall ………………………….. 2” (5 cm)
- Distance above Unit for Printer Access………. 5” (13 cm)
- Maximum Upper Cabinet Shelf Overhang …. M11 – 18” (46 cm)
- Under Cabinet or Shelf…………………………….. M11 – 23” (58 cm)
Relocation Requirements for Sterilizer
- Disconnect power cord from electrical outlet and allow sterilizer to cool.
- Drain water from reservoir or do not tip sterilizer, allowing water to spill.
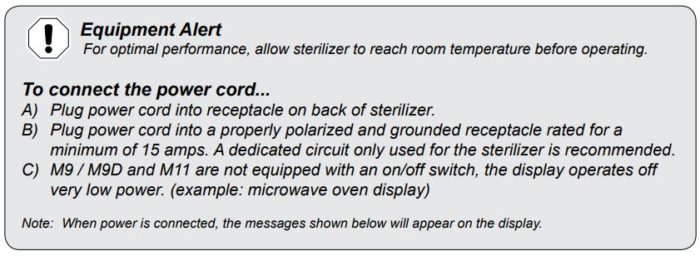
Then Electrical Requirements

| Note: For safety, the unit must be connected to a properly polarized and grounded receptacle. Always use a power cord with grounding connections that match the receptacles in your location. |
|
| 115 VAC Unit: | 115 VAC, 50/60 Hz, 12 amp Dedicated Supply Circuit*: 120 VAC, 50/60 Hz, 15 amp Max. Power Consumption: 1425 Watts |
| 230 VAC Unit: | 230 VAC, 50/60 Hz, 6.4 amp Dedicated Supply Circuit*: 230 VAC, 50/60 Hz, 10 amp Max. Power Consumption: 1500 Watts |
| * Power source must have over-voltage limits less than 1500 watts from mains to ground. (Installation Category II in accordance to IEC664) |
|
Connecting the Power Cord


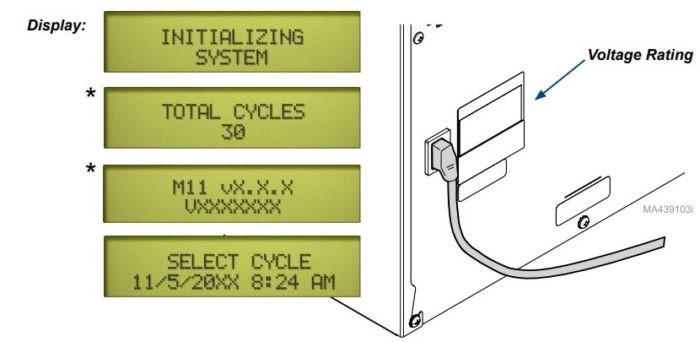
* These screens will display the total number of cycles run on the unit, the model number (M9 / M9D or M11), the software version number, serial number date, and time.
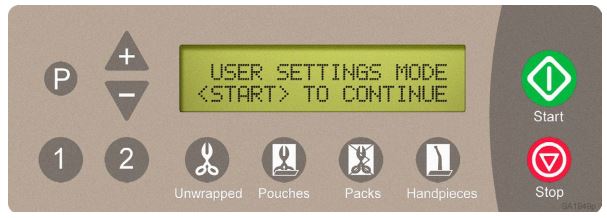
And Finally User Settings
User setting mode will enable the user to set the desired unit of measure and adjust the time clock. To enter the user settings mode, unplug and replug the power cord while pressing and holding the + button until the User Settings screen below appears.
| Action | Description | Display |
|---|---|---|
 | Press start to initialize the User Settings menus. |  |
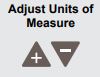 | The “+” and “-” buttons alternate the setting between English or Metric | |
| When the desired Units of Measure appear on the display... | ||
 | To store the desired Units of Measure - This brings up the Time Clock programing display. |  |
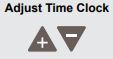 | The “+“ and “-” buttons will adjust the values of the following settings - Year / Month / Day / Hour / AM or PM /Minute. | |
| When the desired values appear on the display... | |
|
| To store setting and bring up the next setting in the list. Repeat as necessary for all settings. When all settings are completed pressing the “P” will initiate normal power up. |
NOTE: User Settings for Date and Clock must be updated manually for day light savings.
*All information taken from Midmark M9/M9D/M11 Self-Contained Steam Sterilizer User Guide TP202 20-42-FO-00014 Rev A1 C2189
As always if you have any questions about this process or anything else please feel free to contact us and take advantage of our “FREE TECH SUPPORT.”
We also offer FREE VIRTUAL TECH SUPPORT to “See and Talk” with a “Real Time Live Technician” for any problems you may be in need of help with.
You can also use our “FREE MAINTENANCE PROGRAM”. Take the guesswork and worrying about what unit is due for maintenance and which maintenance cycle it is time for. We will keep track of all your autoclaves and let you know when it’s time for anything.