
W&H Lexa Mini PM Checklist
Continuing our series of checklists, today we’re moving on to the W&H Lexa Mini autoclave. W&H has made a name for itself with tabletop sterilizers that have taken the market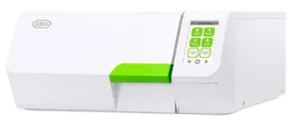 by storm… Such as the W&H Lexa and the subject of this article, the compact W&H Lexa Mini. With preventative maintenance being a vital part of autoclave ownership, here at SAS we try and make the process of performing it as painless as possible. One of the ways we do that, is with out original Preventative Maintenance Checklists, like the one we have for the Lexa Mini.
In this article, we’re going to go over its preventative maintenance checklist. What you need and when you need it to keep it functioning at 100%. And doing everything we can to extend the life of your autoclave for as long as possible. This W&H Lexa Mini PM checklist comes as a part of our Free Preventative Maintenance program.
If you’d like to view or download the checklist for yourself, you can find the W&H Lexa Mini PM Checklist on our site here. And if you have any questions our certified technicians are here to help. You can give us a call at 704-966-1650, and hit option 3 for our Free Tech Support line.
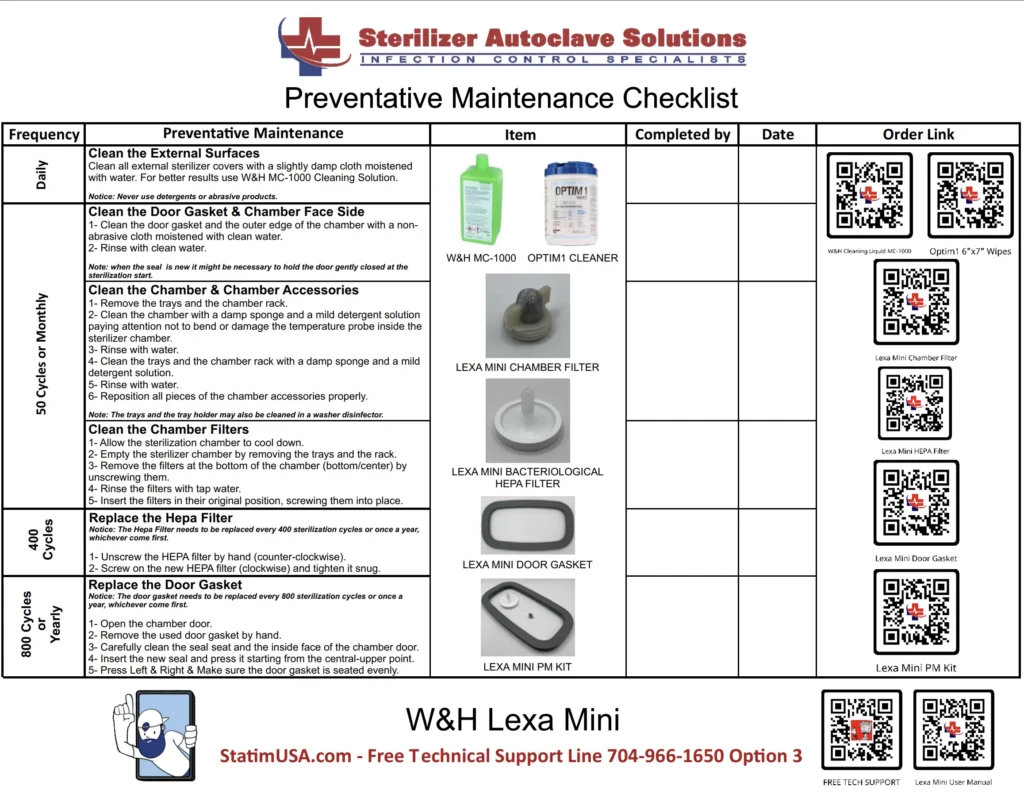
Daily
Clean the External Surfaces
Clean all external sterilizer covers with a slightly damp cloth moistened with water. For better results use W&H MC-1000 Cleaning Solution.
Notice: Never use detergents or abrasive products.
You can find the W&H MC-1000 Cleaning Solution on our site here.
We have Optim1 6″ x 7″ Wipes on our site here.
50 Cycles or Monthly
Clean the Door Gasket & Chamber Face Side
1- Clean the door gasket and the outer edge of the chamber with a nonabrasive cloth moistened with clean water.
2- Rinse with clean water.
Note: when the seal is new it might be necessary to hold the door gently closed at the sterilization start
Clean the Chamber & Chamber Accessories
1- Remove the trays and the chamber rack.
2- Clean the chamber with a damp sponge and a mild detergent solution paying attention not to bend or damage the temperature probe inside the sterilizer chamber.
3- Rinse with water.
4- Clean the trays and the chamber rack with a damp sponge and a mild detergent solution.
5- Rinse with water.
6- Reposition all pieces of the chamber accessories properly.
Note: The trays and the tray holder may also be cleaned in a washer disinfector.
Clean the Chamber Filters
1- Allow the sterilization chamber to cool down.
2- Empty the sterilizer chamber by removing the trays and the rack.
3- Remove the filters at the bottom of the chamber (bottom/center) by unscrewing them.
4- Rinse the filters with tap water.
5- Insert the filters in their original position, screwing them into place.
You can find the W&H Lexa Mini Chamber Filters on our site here.
400 Cycles
Replace the Hepa Filter
Notice: The Hepa Filter needs to be replaced every 400 sterilization cycles or once a year, whichever come first.
1- Unscrew the HEPA filter by hand (counter-clockwise).
2- Screw on the new HEPA filter (clockwise) and tighten it snug
You can find the W&H Lexa Mini HEPA Filter on our site here.
800 Cycles or Yearly
Replace the Door Gasket
Notice: The door gasket needs to be replaced every 800 sterilization cycles or once a year, whichever come first.
1- Open the chamber door.
2- Remove the used door gasket by hand.
3- Carefully clean the seal seat and the inside face of the chamber door.
4- Insert the new seal and press it starting from the central-upper point.
5- Press Left & Right & Make sure the door gasket is seated evenly.
We carry the W&H Lexa Mini Door Gasket on our site here.
You can find the W&H Lexa Mini PM Kit on our site here.
Final Thoughts
If you’ve reached this point, then you should have a good understanding as to what your maintenance schedule should look like. But if you still have questions or there’s help you need, we’ve got options. You can call us anytime at our tech support line at 704-966-1650, Option 3 for free tech support. Or we have our Free Preventative Maintenance Program. Which allows you to submit information on your machine, and WE call YOU whenever it’s time to maintain a part of your autoclave. Our techs will walk you through step-by-step and tell you what part you need and what to do with it.
Hopefully this guide helps you to understand that preventative maintenance isn’t a daunting task as long as you know what to do.
As always if you have any questions about this process or anything else please feel free to contact us and take advantage of our “FREE TECH SUPPORT.”
We also offer FREE VIRTUAL TECH SUPPORT to “See and Talk” with a “Real Time Live Technician” for any problems you may be in need of help with.
You can also use our “FREE MAINTENANCE PROGRAM”. Take the guesswork and worrying about what unit is due for maintenance and which maintenance cycle it is time for. We will keep track of all your autoclaves and let you know when it’s time for anything.
The W&H Lexa Mini PM Checklist is available on our website here.