

Midmark QuickClean Installation Guide
Here at Sterilizer Autoclave Solutions, we always continue to highlight the core elements of the ownership process: installation, operation and maintenance. Whether it’s a fancy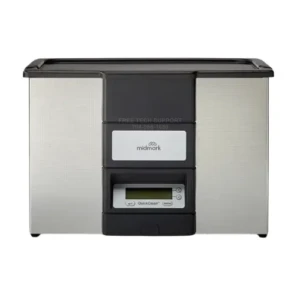 new autoclave, an instrument washer, or even the subject of this article, an ultrasonic cleaner… These 3 pillars of the process are vital to ensure that everything runs as it should. Proper instrument processing relies on a rock-solid foundation, and ensuring your ultrasonic cleaner is set up right from day one is critical.
In this article, we’d like to focus on one ultrasonic cleaner in general, the Midmark QuickClean. We’ve written an overview article about the QuickClean that you can find on our site here if you want to know more. But here, we’ll be covering the first of these core elements, the installation guide for the Midmark QuickClean. Knowing the steps for proper installation helps to mitigate any potential issues from the get go. No more loose drain connections or misplaced units, with this guide from Midmark, your ultrasonic cleaner will be exactly where it needs to be.
If you have any questions about the Midmark QuickClean, ultrasonic cleaners or anything else, give us a call at 704-966-1650 Option 3 for our Free Tech Support Line. Our technicians will help you with any questions you have about your ultrasonic cleaners.
Indications for Use
Ultrasonic cleaning by itself is just sound frequencies above what you can hear. Ultrasonic cleaning is performed through a process called cavitation. Cavitation generates millions of bubbles in the solution. These bubbles grow in size and eventually implode. When these bubbles collapse, the fluid surrounding the bubbles collapses with great force creating shock waves upwards of 20,000 pounds per square inch.
Positioning the Ultrasonic – Counter Top Model
A) The counter-top model may be positioned on a table or a counter top and should be positioned within reach of a standard grounded electrical outlet. The label located on the back of the cleaner will identify proper power requirements
B) Unit should be positioned near a sink to allow for easy drainage.
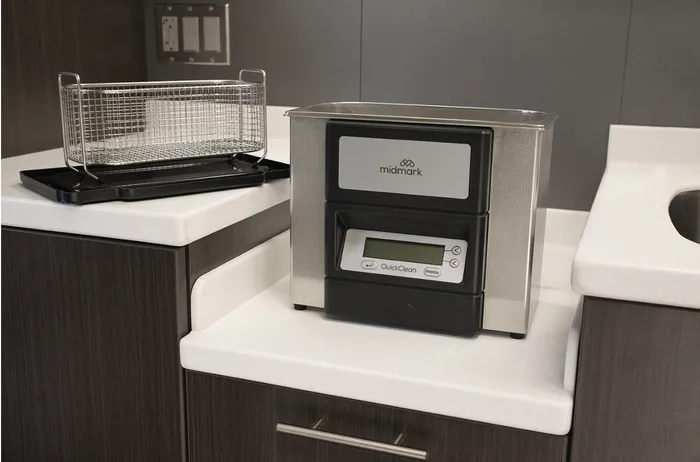
Positioning the Ultrasonic – Recessed Model
A) The recessed model ultrasonic cleaner is designed to be surface mounted into a cabinet top. A rectangle hole must be cut in the cabinet top.
B) The unit should be positioned near an electrical outlet and a sink for proper drainage.
C) Further setup details for this model can be found in the recessed model setup sheet shipped with it, or access it online in the Midmark Technical Library.
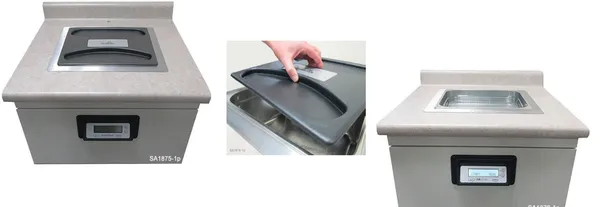
Controls and Indicators
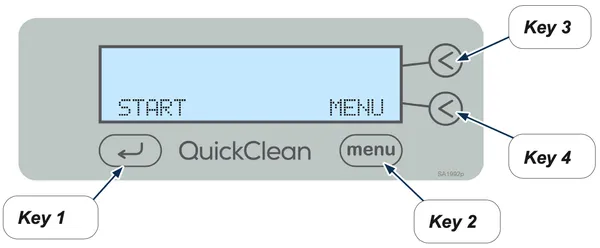
The different keys perform the following functions:
KEY 1: Starts and ends the ultrasonic cycle
KEY 2: Menu – Scroll through the menu
KEY 3: Up/On/Yes – Adjust the settings in the options menu
KEY 4: Down/Off/No – Adjust the settings in the options menu
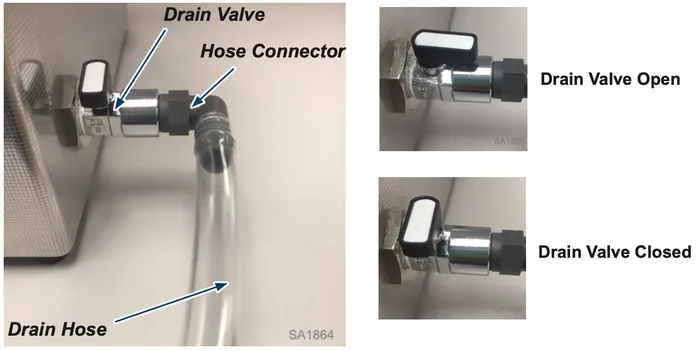
Connecting the Drain Assembly (Table Top Unit)
A) Screw the hose connector into the drain valve at the rear of the unit.
B) Locate the QuickClean® close to a drain or sink and within easy reach of a standard grounded electrical outlet. Do not place on a circuit which could become overloaded.
C) Connect one end of the drain hose to the hose connector, and locate the other end over a bucket or sink. Shorten hose if required.
D) Connect the power cord into a suitable outlet.
E) Ensure that the power plug and the switch are accessible.
F) Make sure the drain valve is closed.
Connecting the Power Cord
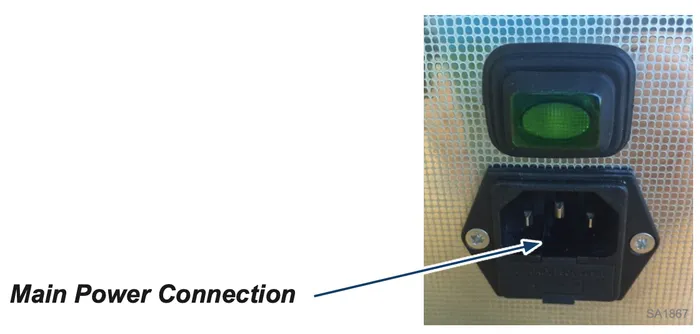
A) Plug the power cord into the main power connection located on the back of your unit
B) Ensure your QuickClean ultrasonic bath is plugged into a 115 VAC fully grounded outlet.
As always if you have any questions about this process or anything else please feel free to contact us and take advantage of our “FREE TECH SUPPORT.”
We also offer FREE VIRTUAL TECH SUPPORT to “See and Talk” with a “Real Time Live Technician” for any problems you may be in need of help with.
You can also use our “FREE MAINTENANCE PROGRAM”. Take the guesswork and worrying about what unit is due for maintenance and which maintenance cycle it is time for. We will keep track of all your autoclaves and let you know when it’s time for anything.
If you want to read more info on the Midmark QuickClean, you can find it on our site here.