
Midmark QuickClean Operation Guide
Here at Sterilizer Autoclave Solutions, we always continue to highlight the core elements of the ownership process: installation, operation and maintenance. Whether it’s a fancy new autoclave, an instrument washer, or even the subject of this article, an ultrasonic cleaner… These 3 pillars of the process are vital to ensure that everything runs as it should. Proper instrument processing relies on a rock-solid foundation, and ensuring your ultrasonic cleaner is set up right from day one is critical.
In this article, we’d like to focus on one ultrasonic cleaner in general, the Midmark QuickClean. We’ve written an overview article about the QuickClean that you can find on our site here if you want to know more. In this article, we’ll be looking at another of these core elements, the operation guide for the Midmark QuickClean. Knowing proper operation is important to ensure that the cycles ran in your Midmark QuickClean are performed properly, ensuring proper instrument cleaning.
If you have any questions about the Midmark QuickClean, ultrasonic cleaners or anything else, give us a call at 704-966-1650 Option 3 for our Free Tech Support Line. Our technicians will help you with any questions you have about your ultrasonic cleaners.
Before Operating the QuickClean
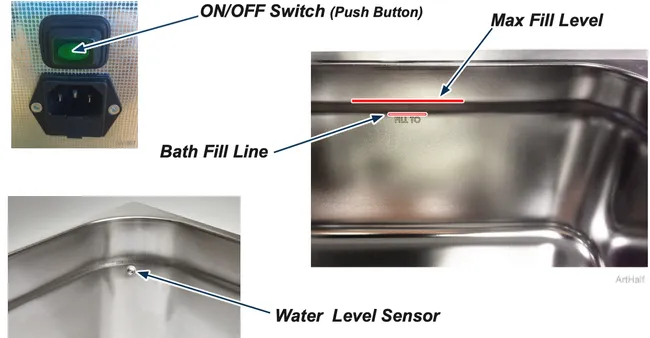
A) Pour water into the bath so that it reaches the liquid level sensor, but do not exceed the maximum fill level. Follow cleaning agent’s recommendations on water temperature. Cleaning efficacy can only be guaranteed if the water temperature is at least 70 F.
B) Add the required dose of cleaning agent. Follow cleaning agent and instrument manufacturers’ recommendations for acceptable cleaners and concentrations. To accommodate for tank size round up the amount of cleaning agent to the nearest
1 oz/gal, 10 ml/l or 10 gram/l. Note: Failure to add correct amount of detergent can cause low level error code.
C) Turn on the machine via the switch at the rear of the unit, just above the power cord. The switch will then illuminate.
D) Run a Degas Cycle.
Equipment Alert
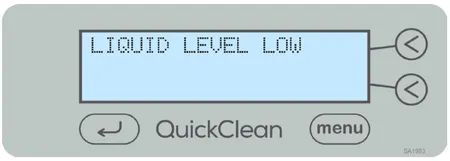
When turning on the QuickClean power and the liquid level is too low, the following screen will display. The unit will not allow you to run a cycle until properly filled. Failure to add correct amount of detergent can cause low level error code.
Degas
- Degas cycle will allow optimal ultrasonic activity by removing gases present in ordinary tap water.
- The time needed to degas the liquid will vary depending on the amount of gas present in the liquid and the quantity of water in the tank.
- A degas period of 5 to 10 minutes is recommended.
- During the degas cycle you will see bubbles of gas forming on the inside of the ultra- sonic bath and slowly rising to the surface, when you no longer see these bubbles come to the surface you can end your degas cycle.
Running a Degas Cycle.
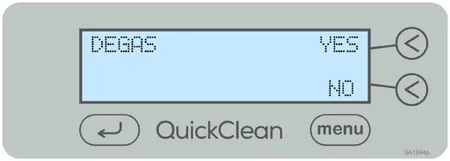
A) When the unit is powered on, when you change the solution or when the liquid has fallen below the water level sensor you will receive the option to degas your ultrasonic.
B) Prior to starting the degas cycle, remove all instruments and make sure the unit is filled with liquid and the required dose of cleaning solution.
C) Place the lid on the ultrasonic unit.
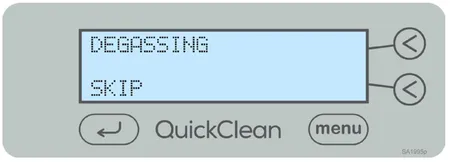
D) Select the upper < YES to start the degas cycle. The screen below will display
E) Once all the bubbles have come to the surface your degas cycle is complete.
F) Press the ↵ left arrow SKIP to end the degas cycle. Your degas cycle will NOT automatically stop when degassing has completed
Preparing to Run a Cycle
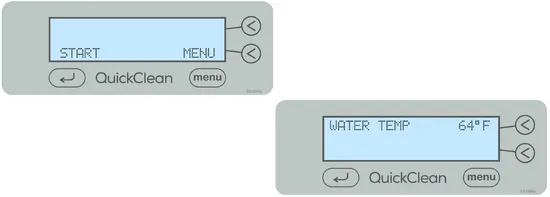
After the degas cycle, or if the degas cycle was skipped the screens above will appear alternately.
A) Place items to be cleaned in the basket.
B) Refer to ultrasonic cleaner weight capacity when loading.
C) Insert accessory basket into the ultrasonic cleaner.
D) Check the bath for the required level of water and cleaning solution.
E) Place the lid on the unit prior to starting the cycle.
F) The ultrasonic is now ready for use. Press the ↵ left arrow key “START” to begin the cleaning cycle.
Note: The ultrasonic has been pre programmed with a cleaning cycle time of 10 minutes. Some components may take longer or shorter to clean effectively depending on the contaminants and the level of contamination. To adjust the cycle time refer to Adjusting cycle time section.
Maximum weight capacity by QuickClean® model
QC1 1.1kg (2.5 lb)
QC3/QC3R 2.5kg (5.5 lb)
QC6/QC6R 5kg (11 lb)
Caution
Always rinse and inspect your instruments to ensure all debris has been removed prior to sterilization.
Equipment Alert
If you are using your bath to clean medical equipment, it is recommended to limit the liquid temperature to 55°C (130°F). This will avoid the coagulation of protein and other bio burden which can then bake onto the equipment.
During Operation
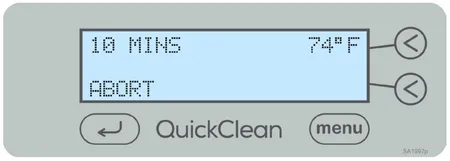
- When the QuickClean is in operation, the following screen will display.
- The actual time will be the time set by the operator and count down in 1 minute increments.
- The temperature shown is the actual liquid temperature, and will increase with use.
- The operator can abort the cycle at any time by pressing the ↵ left arrow key “ABORT”
- If the temperature reaches 140F/60C the unit is too hot. The unit will automatically abort the cycle and you will receive an ABORT – OVER TEMP message.
Successful Completion of Cycle.
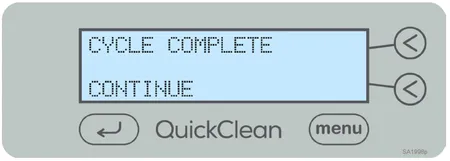
A) On successful completion of the cycle, the below message will display until the operator presses CONTINUE.
B) Remove the basket from the bath, rinse and inspect after cleaning
C) Your QuickClean remembers the set parameters from the previous cycle. If the operator wants to run the same cleaning cycle press CONTINUE. It is not necessary to run through the menu each time.
D) Your unit is factory preset to run a 10 minute cycle.
Note
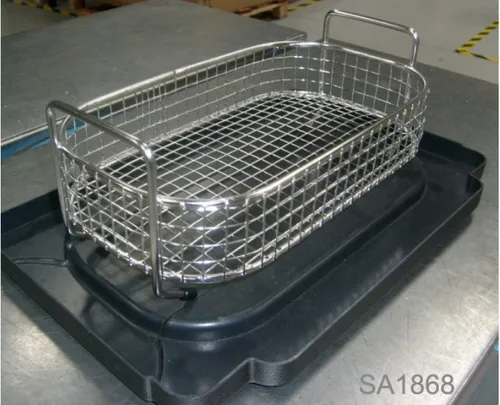
The lid can be inverted and the basket placed on top to catch excess liquid.
Setting Options
- A number of the QuickClean® cleaning parameters can be altered. (Cycle Time, Power Level, Degas, Leap, Temp Unit)
- Your QuickClean remembers the set parameters from the previous cycle.
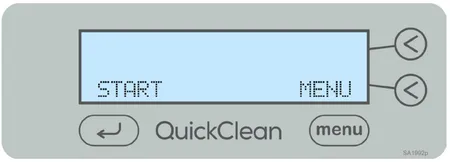
A) To access the options menu and scroll through the various changeable parameters, press the MENU key, when the main screen below is displayed.
B) To scroll through the menu, press the MENU key. To exit the MENU at any time, press the ↵ left arrow key.
C) When you exit the Settings Options, DO NOT SWITCH THE MACHINE OFF; you must start a cycle for the new settings to be saved. Once saved, the new settings will be used each time the machine is switched on.
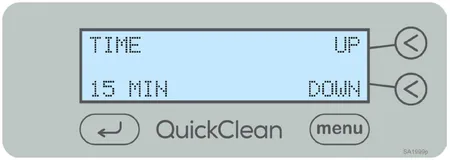
Adjusting Cycle Time
- Your ultrasonic enables the user to set the cycle time from 1 minute up to 99 Minutes.
- Your ultrasonic has a factory preset cycle time of 10 minutes.
A) Press the Menu button and the TIME screen below will appear
B) Use the < UP and < DOWN keys to increase or decrease the desired cycle time.
C) When the desired cycle time has been selected, use the MENU key to move to the next screen, or press the left arrow to go back to the “Start” screen.
D) Start a cycle to store the desired cycle time.
Setting Power Level
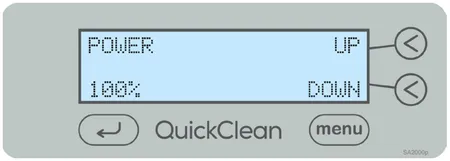
- Your ultrasonic bath allows the user to adjust the power level of the ultrasonic activity. This allows the cleaning cycle to be accurately tailored to the specific cleaning application.
- Your ultrasonic is factory set with a power level of 100%
A) Press the Menu button and scroll to the Power screen as shown below.
B) Use the < UP and < DOWN keys to adjust the power level between 70 and 100%.
C) When the desired power level has been selected, use the MENU key to move to the next screen, or press the left arrow to go back to the START screen.
D) Start a cycle to store the desired power level.
Setting Degas Function
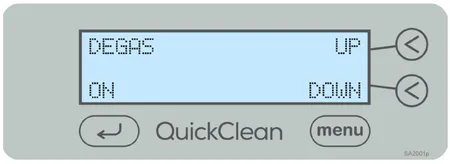
- Your ultrasonic bath allows the user to set the degas function to ON. Turning the degas function ON will run a degas cycle every time the cycle start key is pressed.
- Your ultrasonic is factory set with the degas function turned OFF. The OFF setting means the degas function is automatically offered when the power switch is turned on, when you change the solution, or when the liquid has fallen below the liquid level sensor.
A) Press the Menu button and scroll to the Degas screen as shown below.
B) Use the < ON and < OFF keys to set the degas function ON or OFF.
C) When the desired setting has been selected, use the MENU key to move to the next screen, or press the ↵ left arrow to go back to the START screen.
D) Start a cycle to store the desired degas function setting.
Setting Frequency Leap
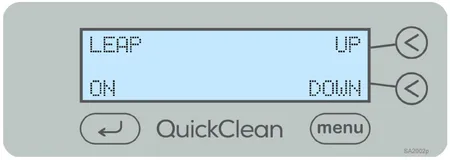
- Frequency LEAP technology provides more homogeneous ultrasonic cleaning activity throughout the whole tank.
- Using advanced software and generators, the ultrasonic uses Frequency LEAP to create a pseudo-random leaping action between a wide frequency range, reducing standing waves and improving the cleaning action.
- Your ultrasonic has a factory set LEAP function of ON. The ON setting means the Frequency LEAP is automatically offered when the unit is turned on.
A) Press the Menu button and scroll to the LEAP screen as shown below.
B) Use the < ON and < OFF keys to set the leap function ON or OFF.
C) When the desired setting has been selected, use the MENU key to move to the next screen, or press the left arrow to go back to the START screen.
D) Start a cycle to store the desired leap function setting.
Setting Temperature Units of Measure
Your QuickClean enables the user to set the units of measure displayed in either Fahrenheit or Celsius.
Your ultrasonic has a factory preset setting of Fahrenheit.
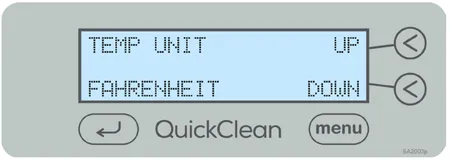
A) Press the Menu button and scroll to the TEMP screen as shown below.
B) Use the < UP and < Down keys to select between Fahrenheit or Celsius.
C) When the desired setting has been selected, use the MENU key to move to the next screen, or press the left arrow to go back to the START screen.
D) Start a cycle to store the desired temperature setting.
Advanced Menu Options
- The Advanced Menu allows different settings to be specified which may not require regular changes and also allows the usage history of the individual QuickClean® ultrasonic bath to be seen.
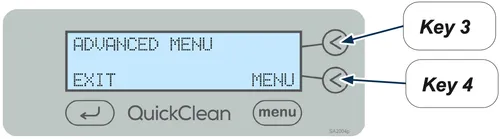
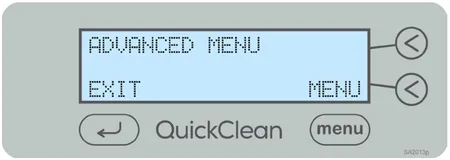
A) To access the advanced menu, press and hold Keys 3 and 4 together. The below screen will appear:
B) In order to scroll through the settings available in the Advanced Menu, press the MENU key. You may exit the Advanced Menu at any time by pressing the ↵ left arrow key.
C) Press the MENU key to move to the next screen.
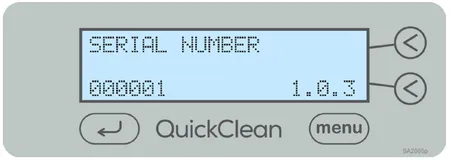
Serial Number
The first screen shows the unique serial number of your QuickClean ultrasonic bath and the version of software. [The software version implemented on your bath may be different to that shown.]
Time Used
This screen shows the total time your QuickClean ultrasonic bath has been in use in days, hours and minutes; i.e. the sum of all the cleaning cycle times since new.
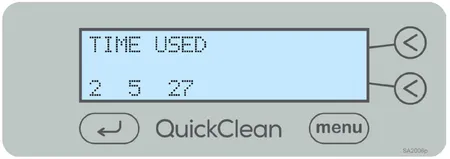
This example shows that the bath has been in use for a total of 2 days, 5 hours and 27 minutes.
NOTE: Press the MENU key three times to move to the next screen.
Cycle Count
The cycle count shows all cycles which the bath has begun and includes those cycles which are not completed; i.e. those cycles aborted by the operator or because the liquid level was low.
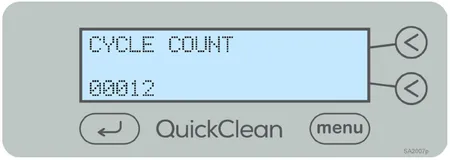
This example shows the number of cycles which the QuickClean® ultrasonic bath has run since new.
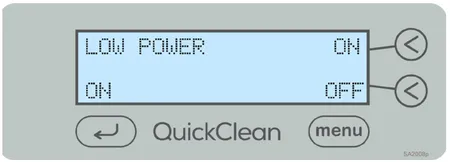
Low Power
- The QuickClean can be set to save power when not in use.
- In its factory preset mode, ON means that after five minutes of inactivity, the QuickClean ultra- sonic bath will enter sleep mode, the screen illumination will power down.
- The QuickClean uses less than 10 Watts of power while in sleep mode.
- By setting Low Power to OFF, the QuickClean screen will be illuminated constantly while the machine is plugged in.
Liquid Level Sensor
The liquid level sensor is preset at the factory to ON. Meaning if the liquid level falls below the required level during operation, the cycle will STOP.
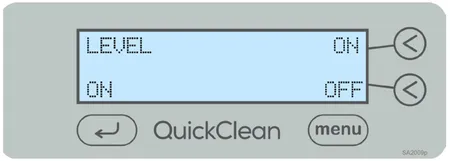
Turning the level sensor OFF is for special cleaning applications with very low conductivity liquids such as pure deionized (DI) water.
Liquid Level Sensor (continued)
When the OFF button is pressed and the ↵ left arrow key is selected to continue, a message will appear to check that the operator has filled the tank up to the level indicated.
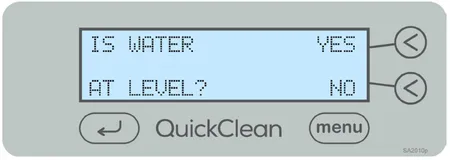
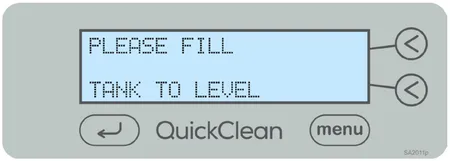
If ‘NO’ is selected an instruction will appear requesting the tank be filled to level before use. After a few seconds the screen will go back to the one shown above
Equipment Alert
Running the bath while it is dry will cause damage to your QuickClean® Ultrasonic Bath and void the warranty.
Portable Appliance Testing
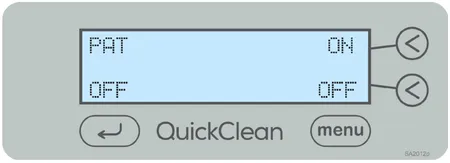
Portable appliance testing must be conducted with water in the bath. Only a trained, qualified electrical engineer must perform a PAT test.
To advance to the next screen press MENU. To exit the Advanced Menu press the EXIT button.
As always if you have any questions about this process or anything else please feel free to contact us and take advantage of our “FREE TECH SUPPORT.”
We also offer FREE VIRTUAL TECH SUPPORT to “See and Talk” with a “Real Time Live Technician” for any problems you may be in need of help with.
You can also use our “FREE MAINTENANCE PROGRAM”. Take the guesswork and worrying about what unit is due for maintenance and which maintenance cycle it is time for. We will keep track of all your autoclaves and let you know when it’s time for anything.
If you want to read more info on the Midmark QuickClean, you can find it on our site here.