
Midmark QuickClean Maintenance Guide
Here at Sterilizer Autoclave Solutions, we always continue to highlight the core elements of the ownership process: installation, operation and maintenance. Whether it’s a fancy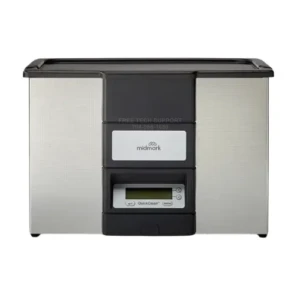 new autoclave, an instrument washer, or even the subject of this article, an ultrasonic cleaner… These 3 pillars of the process are vital to ensure that everything runs as it should. Proper instrument processing relies on a rock-solid foundation, and ensuring your ultrasonic cleaner is set up right from day one is critical.
In this article, we’d like to focus on one ultrasonic cleaner in general, the Midmark QuickClean. We’ve written an overview article about the QuickClean that you can find on our site here if you want to know more. But here, we’ll be covering the last of these core elements, the maintenance guide for the Midmark QuickClean. Understanding proper maintenance is vital to the ownership process of any machine you have, ultrasonic cleaner or not. When your unit has an issue, knowing how to properly resolve the issue helps prevent any lasting problems and potential long term damage.
If you have any questions about the Midmark QuickClean, ultrasonic cleaners or anything else, give us a call at 704-966-1650 Option 3 for our Free Tech Support Line. Our technicians will help you with any questions you have about your ultrasonic cleaners.
Maintaining Your Ultrasonic
It is important to keep your bath clean. Not only will contaminated liquid reduce the performance of the bath, it may also damage it. Change the cleaning liquid regularly. Your cleaning process will determine how often to change the liquid – the more soiled your items, the more often you will need to change the liquid.
Before cleaning the equipment always switch off and disconnect it from the power supply and allow it to cool down to less than 40°C/104°F. Clean by wiping with a damp soapy cloth and rinse.
The base of the bath generates the ultrasonic activity by vibrating at very high speeds. If any contaminants are in contact with the bath, they act as an abrasive, causing wear on the metal surface. In extreme cases, the bath will develop holes and start to leak.
Equipment Alert
Ensure basket has rubber feet in place. Worn/missing rubber feet can cause damage to the tank .
How to Perform the “Foil” Test
Purpose: Used to Determine the Efficiency of an Ultrasonic Cleaner.
- Quarterly testing of the ultrasonic cleaner to assure that it is operating properly is recommended.
- Testing should also be performed whenever deterioration in the cleaner performance is suspected.
- This foil test is relatively easy to perform and will provide a permanent record for the future comparative evaluation of the ultrasonic cleaners performance.
Step 1.) Obtain a roll of any standard weight household aluminum foil. (Note: It is important to note that the thickness of the foil will directly impact test results. Ensure using a consistent thickness of foil throughout the life of testing for accurate comparison.)
Step 2.) Make a rigid support to which the aluminum foil will be attached. Cut a strip of autoclave indicator tape 2 inches longer than the length of the ultrasonic cleaner tank. The material this support is made of isn’t critical it just needs to provide a rigid support that can be laid across the top of the tank to provide a support to attach the foil to.
Step 3.) Cut a piece of foil approximately 6” in length and wide enough to attach to the support prepared in step 2 and suspend almost to the bottom of the tank. The foil must not touch the bottom or sides of the tanks. Care should be taken to avoid crinkling of the foil.
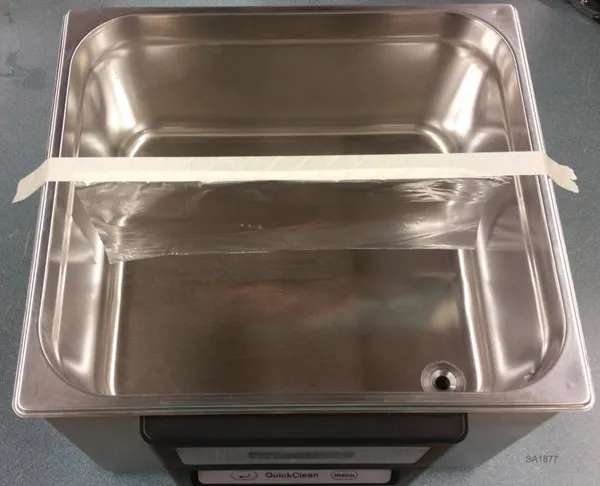
Step 4.) With the foil test sample removed from the tank, prepare a fresh ultrasonic cleaner solution by filling the tank to the fill line. Add the recommended amount of Midmark cleaning solution and finish filling the tank to specified level with water.
Step 5.) Turn the ultrasonic on and run the degas cycle 10 minutes to degas the solution.
Step 6.) With the ultrasonic cleaner off and the basket removed, lower the foil sample into the center of the tank positioning it so the foil isn’t touching the sides or bottom of the tank. For larger units, e.g. QuickClean® QC6, multiple samples should be used to get a better sampling of the uniformity of the ultrasonic cavitation in the tank.
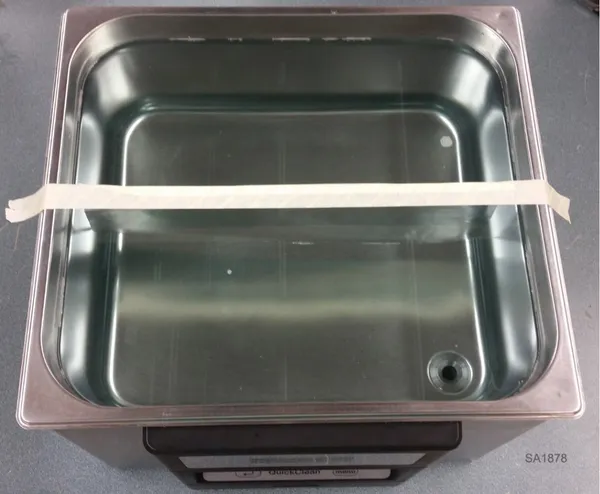
Step 7.) Turn the ultrasonic cleaner on for 1 minute. Remove the foil sample allowing the excess cleaning solution to drain off the foil. Allow the sample to air dry, being careful not to wrinkle the foil.
Step 8.) The foil surface actually submerged in the solution should be uniformly covered with a small dimpling or pebbling effect, over the entire surface. There may also be some holes in the foil as a result of erosion caused by the interaction between the cleaning solution, the foil, and the ultrasonic action, but the objective of this test is to see how uniform the pebbling is, not how many holes are in the foil. If there are a large excessive number of holes in the foil sample, run another test decreasing the exposure time to get a better sampling of the uniformity of the dimpling.
Results: The entire submerged area of the foil should be uniformly pebbled with tiny dimples from the ultrasonic implosions. Areas greater than 1”diameter, the size of a quarter, that doesn’t have pebbling, may indicate that there is a problem with the ultrasonic unit.
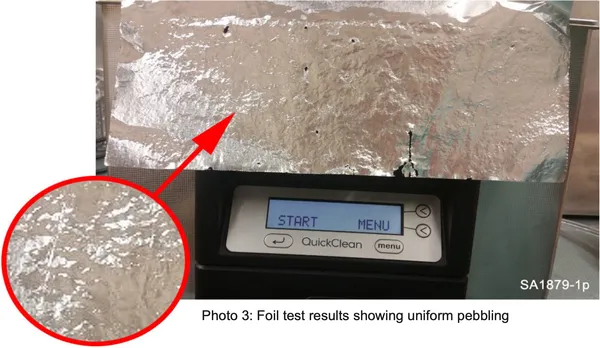 Step 9.) If the results indicate a possible problem repeat the above steps using a new foil sample. If the results are the same contact your service provider to have the unit evaluated / repaired.
Step 10.) If the results confirm uniform cavitation (dimpling / pebbling of the foil) throughout the tank, label, date and file the foil test sample for future comparative purposes.
Note: the ultrasonic solutions should be removed from the tank prior to cleaning instruments, as the solution left is foil contaminated
Troubleshooting and Aborting a Cycle
- If the unit fails to turn on (no display is shown) Check that the unit is plugged in and that main power is present.
- If a cycle is aborted, by the operator or by the unit, the reason for the failure will be displayed.
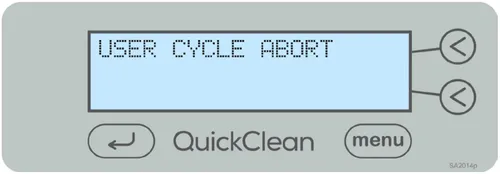
USER CYCLE ABORT
If the operator aborts the cycle, the following screen will be displayed
 ABORT LEVEL LOW
If the liquid level sensor is set to ON and the liquid drops below the required level during operation, the cleaning cycle will stop and the following screens will alternate.

Solutions:
- Fill the QuickClean with water so that it is above the fill line indicated inside the tank.
- If you are using “normal” water ensure that the detergent has been added.
- If the water in your area is “hard”, slightly more detergent may be required.
- If “pure” water (e.g. De-I or RO) is being used, the level sensor can be disabled in the advanced menu.
- Note: Failure to add correct amount of detergent can cause low level error code.
ABORT SONICS LOW
If the power to the ultrasonic generator should fall below a certain level during operation, the cleaning cycle will stop and the following screens will alternate.

Solutions:
- The QuickClean® is fitted with an ultrasonic power detector, which monitors the ultrasonic activity in the bath during a cleaning cycle.
- If the ultrasonic power drops below a certain point, the cycle will be incomplete and this message will display. This is not necessarily caused by a problem with the machine.
- If this message displays, run another cycle to see if the problem persists.
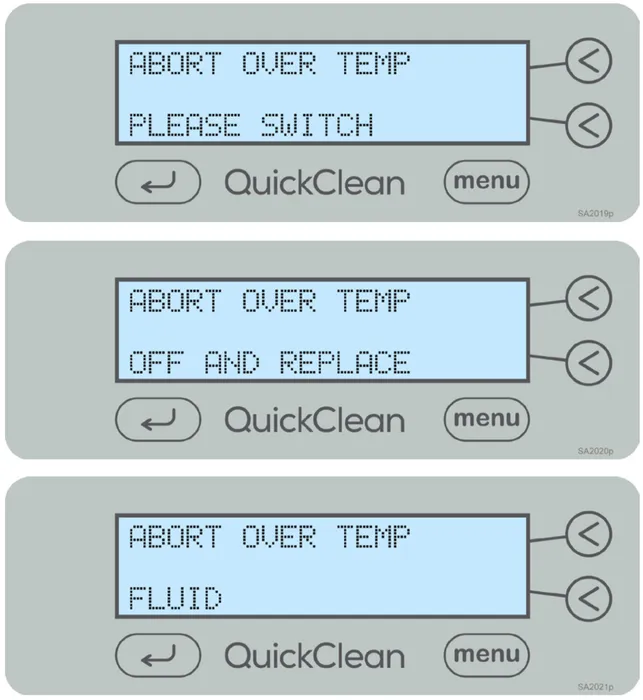
ABORT OVER TEMP
If the liquid temperature exceeds the allowed maximum of 140°F (60°C), the following screens will scroll.
 Solutions:
- The QuickClean has detected that the water in the bath is above 140ºF/60ºC and has aborted the cycle.
- Please allow the liquid to cool or drain some fluid and replace with cooler liquid.
ABORT (unit over temp)
If the unit overheats due to prolonged use, the following screens will scroll.
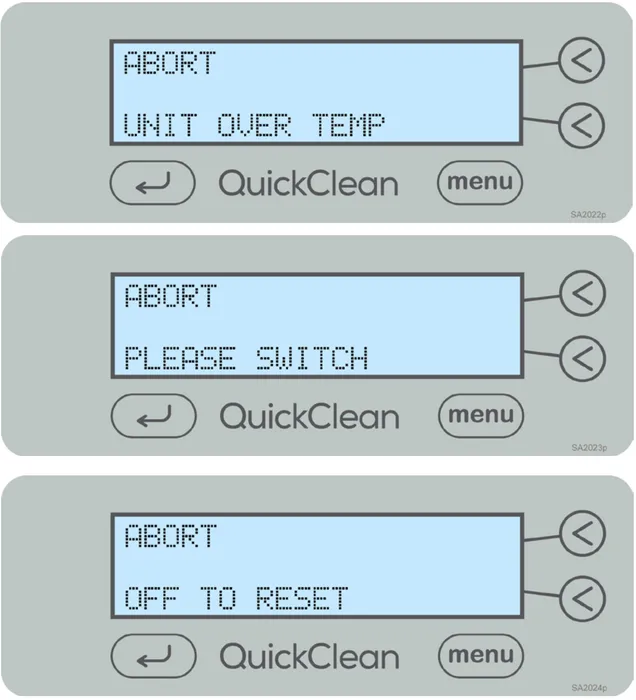
Solutions:
- The QuickClean® has detected that the ultrasonic generator on the unit has operated above the rated temperature and has disabled the ultrasonic function.
- This also disables a cycle from starting.
- The most likely cause is the liquid evaporating when the level sensor is switched off.
- Switch the unit off, allow the unit to cool for a few minutes, top up the liquid above the level sensor and switch the unit back on.
As always if you have any questions about this process or anything else please feel free to contact us and take advantage of our “FREE TECH SUPPORT.”
We also offer FREE VIRTUAL TECH SUPPORT to “See and Talk” with a “Real Time Live Technician” for any problems you may be in need of help with.
You can also use our “FREE MAINTENANCE PROGRAM”. Take the guesswork and worrying about what unit is due for maintenance and which maintenance cycle it is time for. We will keep track of all your autoclaves and let you know when it’s time for anything.
If you want to read more info on the Midmark QuickClean, you can find it on our site here. →
We have the Midmark QuickClean Installation Guide available to read on our site here →
We have the Midmark QuickClean Operation Guide available to read on our site here →